If you want to restore Windows XP taskbar in Windows 7 follow the following steps-
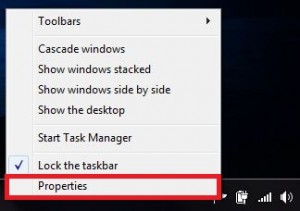
1. Right click the Windows 7 taskbar and select ‘Properties’.
2. In the ‘Taskbar’ tab, click ‘Customize’.
3. Uncheck the ‘Always show all icons and notifications on the taskbar’ option and click ‘OK’.
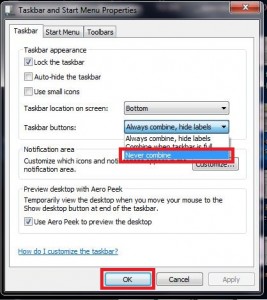
4. Back on the previously opened ‘Taskbar and Start Menu Properties’, in ‘Taskbar buttons:’ select ‘Never combine’ and click ‘OK’.
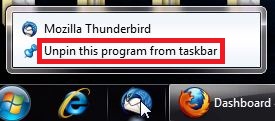
5. Right click the pinned programs on the taskbar one by one and select ‘Unpin this program from the taskbar’ for all of them.
6. Right click the taskbar and select ‘Toolbars>New Toolbar’.
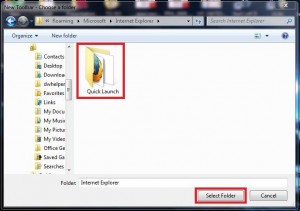
7. Navigate to the following path: ‘C:\Users\<User Name>\AppData\Roaming\Microsoft\Internet Explorer’. (Replace <User Name> with the name you are logged in with). Select ‘Quick Launch’ and click ‘Select Folder’.
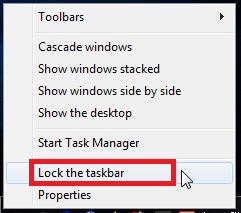
8. Right click the taskbar and uncheck the option ‘Lock the taskbar’.
9. Now grab and drag the ‘Quick Launch’ toolbar to the new position as shown.
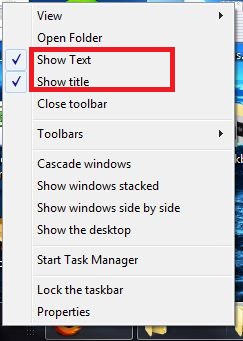
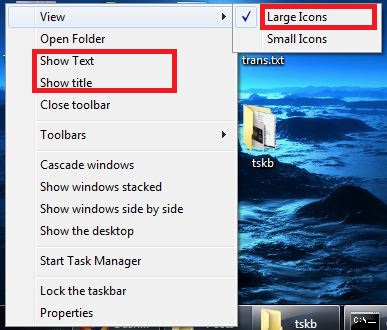
10. Right click the ‘Quick Launch’ toolbar and uncheck the options ‘Show Text’ and ‘Show Title’.
11. Right click the ‘Quick Launch’ toolbar and in ‘View’ options select ‘Large Icons’.
12. Right click the taskbar and check the option ‘Lock the taskbar’.
13. There you have it! Windows XP taskbar restored in Windows 7 in few easy steps.
Hope you find today’s post useful in making Windows 7 more user friendly 😀
