Here’s how to mount a virtual hard drive (.vhd) in Windows 7 –
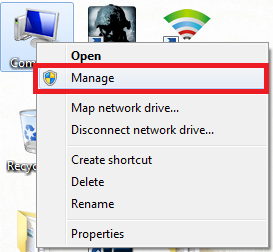
1. Right click the computer icon and select ‘Manage’.
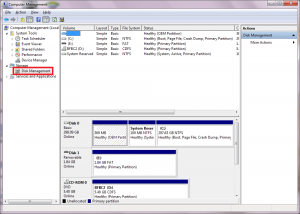
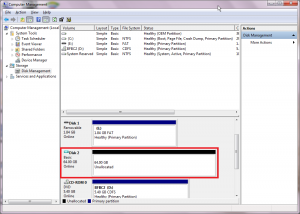
2. Select ‘Disk Management’.
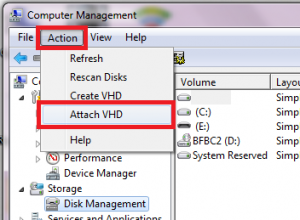
3. Click ‘Action>Attach VHD’.
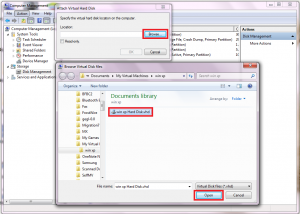
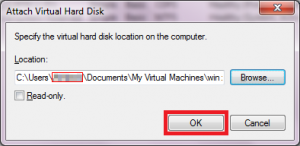
4. Click ‘Browse’, navigate and select your virtual hard drive and click ‘Open’.
5. Click ‘OK’ to mount the virtual drive. The first time you want mount a virtual drive in Windows 7, you’ll see a notification in the system tray informing you that Microsoft Virtual Hard Drive Host Bus Adapter driver was installed successfully.
6. The virtual hard drive will be mounted and you can perform operations on it like you do on any regular physical disk. If partitions are present on the virtual hard drive, you can browse them via windows explorer like a normal partition.
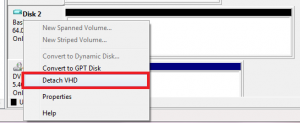
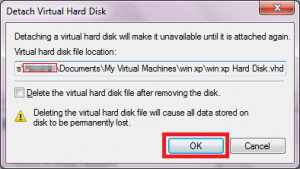
7. After you are done using the virtual hard drive, to unmount it, right click the virtual hard drive and select ‘Detach VHD’. Then click on ‘OK’ to confirm the unmount operation.

[…] This post was mentioned on Twitter by AVP, ihaveapc. ihaveapc said: How To Mount A Virtual Hard Drive (.vhd) In Windows 7 http://goo.gl/fb/2veVY […]