Here’s how to enable check boxes in Windows 7 Explorer:
1. Launch Windows Explorer by pressing ‘Windows’ + ‘E’ key.
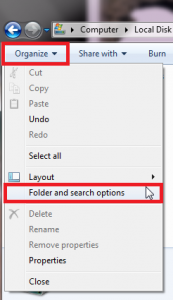
2. Click on ‘Organize>Folder and search options’.
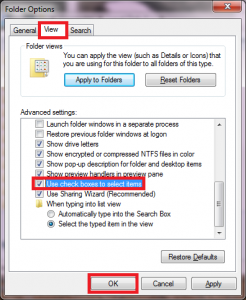
3. Click on ‘View’ and check the option ‘Use check boxes to select items’. Click ‘OK’ when done.
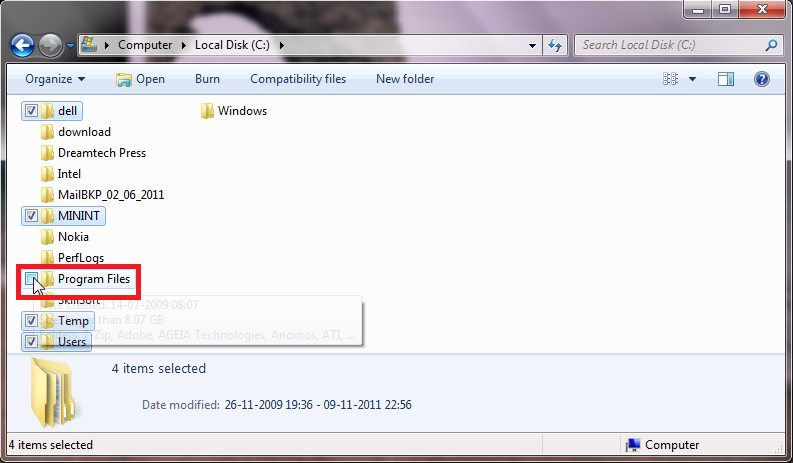
4. Just hover the pointer over a folder / file and the check box will appear automatically. You can now use the check boxes to select multiple items instead of holding down the ‘Ctrl’ key and then clicking them.


