Continuing from Part 3, in this part of the tutorial, we will learn about modifying the properties of the ZFS pool and destroying the ZFS pool.
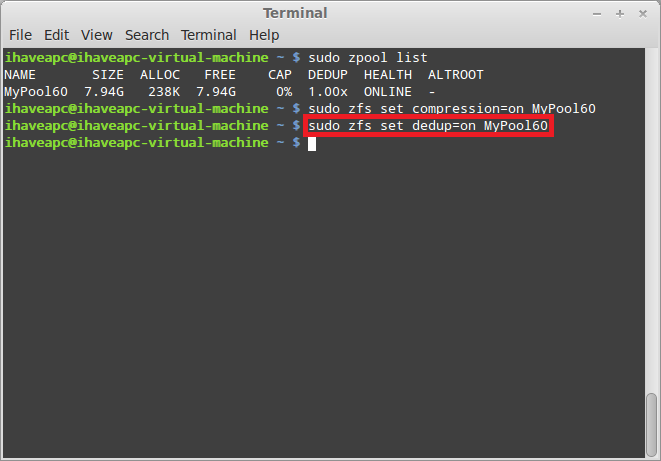
1. Let us view the list of ZFS pools available in the system. Issue the following command at the terminal –
sudo zpool list
2. As seen in the previous step, we have a ZFS pool called ‘MyPool60’ available on the system. Now, we will learn how to modify the properties of the ZFS pool. The syntax for the command is –
sudo zfs set <property>=<value> <ZFS pool name>
3. To enable compression on ‘MyPool60’, issue the following command at the terminal –
sudo zfs set compression=on MyPool60
The above command will enable compression for the data stored in ‘MyPool60’ enabling efficient utilization of storage space.
4. To enable data deduplication on ‘MyPool60’, issue the following command at the terminal –
sudo zfs set dedup=on MyPool60
The above command will enable deduplication (similar patterns of data are stored only once) for the data stored in ‘MyPool60’ and further enhance storage space utilization.
5. To verify that the compression and deduplication has been enabled on ZFS pool, we will use the following command to view properties of the pool –
sudo zfs get all <ZFS pool name>
Hence, for viewing properties of ‘MyPool60’, issue the following command at the terminal –
sudo zfs get all MyPool60 | more
Note that the compression and deduplication is set to ‘on’.
6. To destroy a ZFS pool, we can use the following command –
sudo zpool destroy <ZFS pool name>
Note that the above command will destroy all the data stores in a ZFS pool, hence, don’t use this command in production environment unless you know what you are doing!
To destroy ‘MyPool60’, we will issue the following command at the terminal –
sudo zpool destroy MyPool60
The above command will destroy MyPool60 along with all the data that has been stored and free the member HDDs of the ZFS pool. We can verify that MyPool60 has been destroyed by running the following command at the terminal –
sudo zpool list
[To be continued in Part 5…]


[…] from part 4, in today’s post we’ll learn how to create ZFS data set for a user and mount it to a […]
[…] [To be continued in Part 4…] […]