Windows Defender is an effective antivirus program that comes enabled by default in Windows 10.
Configuring settings :
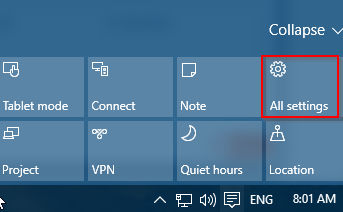
First, a few key settings can be checked to ensure that real time protection is enabled and working as expected. To access these settings, click on All settings icon from the Action Center in system tray.
Next, click Update & Security.

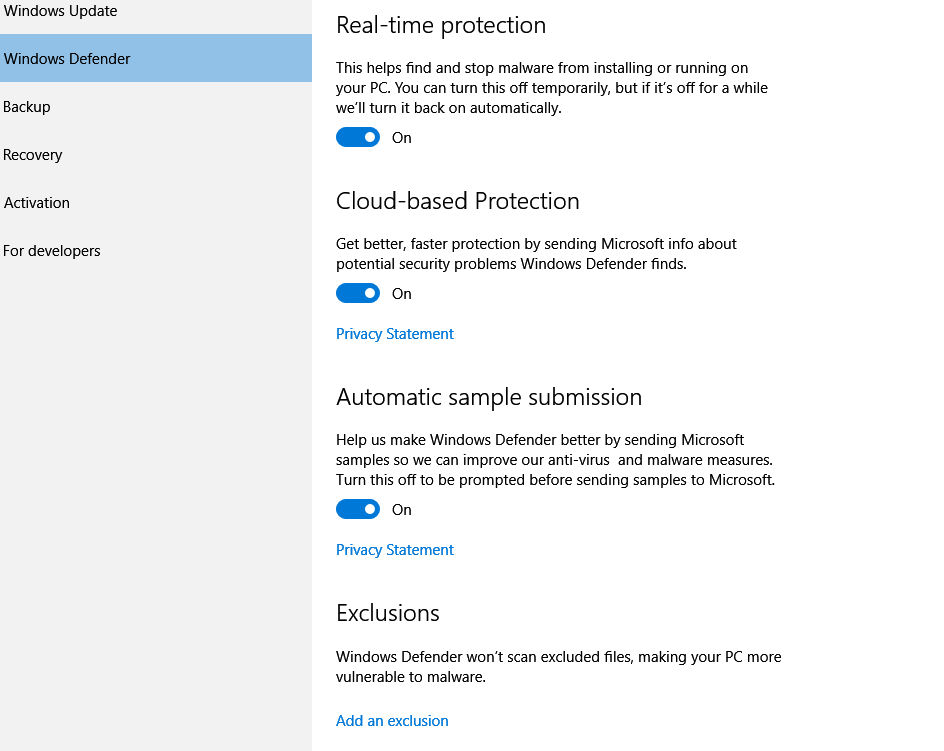
From the Windows Defender tab, make sure that Real-Time protection and Cloud-based Protection is enabled. It is recommended to have the Automatic Sample Submission enabled as well for better detection of malware traits. If any source location needs to be skipped or excluded from being monitored by Windows Defender, that can be added here as well (although not recommended).
Using Windows Defender :
From the bottom of these settings page, to access Windows Defender, click Open Windows Defender. Alternatively, it can be directly accessed from Control Panel.

Windows Defender will automatically check and download latest definitions as and when they are available. However, manual updates can also be done by clicking on Update definitions from the Update tab.
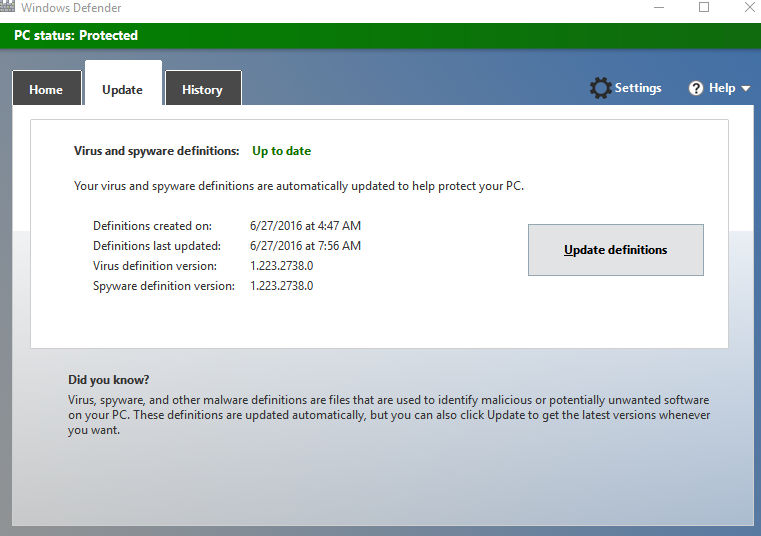
It can be useful to keep an eye on the timestamp for Definitions created on and Defintions last updated. For best results, there should not be a large time gap between these two as it will increase vulnerability to latest malware. Hence, if for some reason these definitions are not updated automatically, a manual update becomes necessary.
Updating definitions manually will force Windows Defender to check for latest updates.
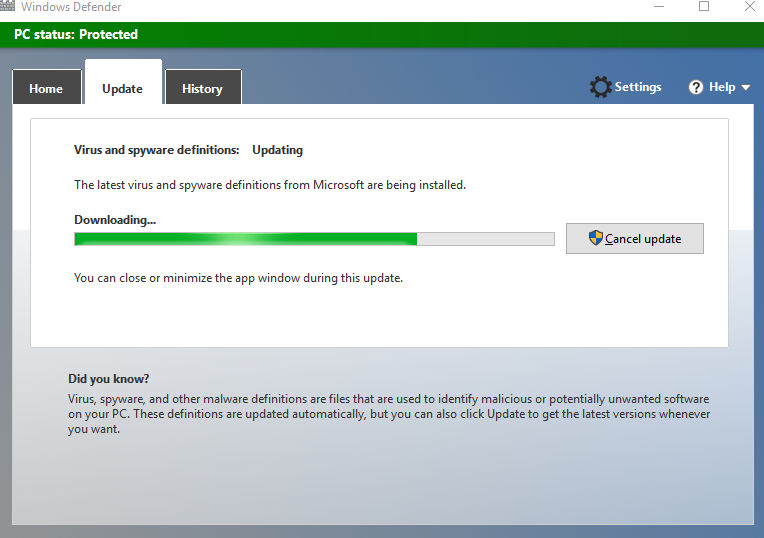
If everything is ok, the Home tab will display an all clear status.
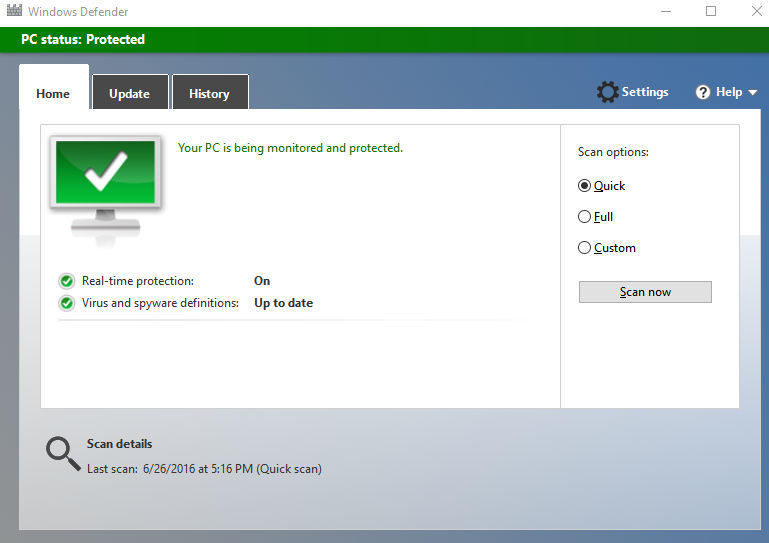
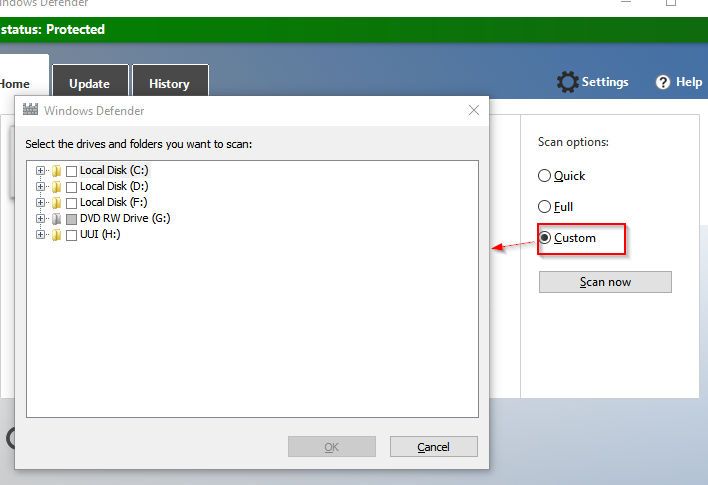
The Scan options available in Windows Defender includes a Full system scan (slowest and most thorough), Quick (scans common files/folders and completes quicker than the full scan) and Custom scan which only scans drives and source paths as specified manually.
Choose the scan type and click Scan now.
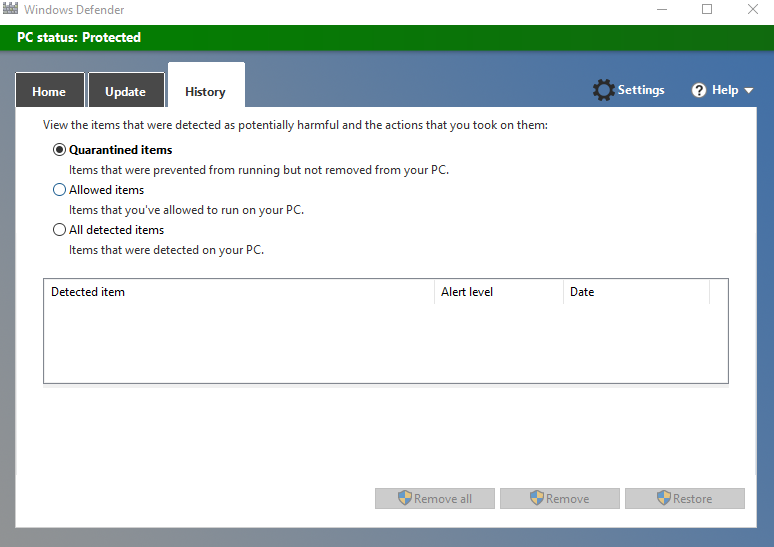
Finally, once the scan is complete, to see what infected/quarantined or allowed items were detected during the Defender scan, click on the History tab and then on View Details.
For maximum security and protection, always keep Windows Defender updated and scan the system regularly. Also, for extra protection, use a sandbox program like Sandboxie that isolates programs and runs them separately in a secure space.
All done.
