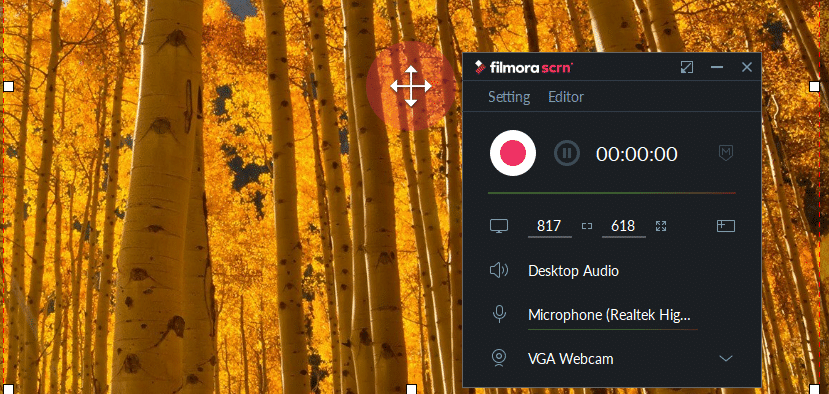
Wondershare Filmora Scrn is one of the best screen recording software for beginners which allows you to capture screencasts, webcasts and gameplay with ease. It also has a built-in editor which can be used to edit these captures and add various effects.
Some of it’s key features are :
- Capture webcam, mic, system audio/video simultaneously
- Export saved video captures as MP4, MP3, MOV and GIF.
- Record PC games
- Edit video captures using the editor
- Share the video captures directly in Vimeo, YouTube, Facebook and Twitch
For installing it on PC, a 64 bit Windows version is needed. The setup can be downloaded from here.
Trial version has the recordings watermarked while the full version doesn’t have that restriction. (By the way, there is a giveaway that is active till 4th June where one lucky winner will get a license of Wondershare Filmora Scrn. More details here. :))
Once downloaded, run the setup. Choose Customize Install to change the default installation path or keep the default.

The installation is simple but may take a while to complete.

After it is installed, using Filmora Scrn basically involves using the recording features and the video editing features :
- Get Started
- Quick Capture
- Video Editor

Quick capture: It uses the default screen capture and recording settings.
Get Started: This is where various recording settings can be changed. Let’s take a look at each of them.
Configuring Capture Settings:
The capture setup when Get Started is selected is essentially divided into four main parts :
1. Screen : This is for recording the desktop screen. Custom area can be defined as well as the frame rate can be specified (between 15 fps to 120 fps).

The available options for screen size can be full screen or setting a custom size later along with the target window.

2. Game : This is for recording PC gameplay. Select the game which needs to be recorded from the drop-down of Choose a Game, select the frame rate and then run it.

3. Audio : Mic and system audio can be enabled or disabled during the capture. The settings for those can be changed from Audio section.

4. Camera : This is for recording webcam video. Choose the input camera, resolution and frame rate as needed. The higher the settings, the larger will be the size of captured videos.

Advanced : This is used to change the path where recorded captures will be saved. Other options include enabling GPU acceleration, changing the encoding type AVC/H.264 or FastJPG and setting Hotkeys.

Finally, click Capture. Position the recording area by dragging/resizing the red dotted borders and dragging the center red circle. Turn on/off audio and mic and webcam as needed. Custom resolution too can be set from here.

Click the recording button to begin capture. It will begin after a delay of 3 seconds by default and can be paused or stopped/started by F10 and F9.

Once the recording is on, the time elapsed will be shown at the bottom of screen. The capture can be stopped anytime.

The recorded file can now be edited and saved.
Using the editor:
Wondershare Filmora Scrn has a built-in editor which can edit these recorded audio/video files. It can either be accessed from the main screen or by selecting Menu in the Capture setup.
These files would be auto saved and show up when the editor is launched. .

From here, it can either be exported as a MP3/MP4/MOV or a GIF file using Export > Create Video option.

Other editing options including Annotations from the left pane of editor. This can be useful when creating video tutorials.
Also, various cursor effects can be added through the editor using Cursor section. It will show the available effects which can be added to cursor. Again, this would be useful in creating tutorials where steps or areas need to be highlighted.

Once the changes are made, the video file will be saved in the location specified in the Advanced settings section.

These video files can then be shared as needed.
Overall, this is an easy to use screen recording tool.
Do try it out.
