The video editing software provider Filmora has re-branded its video editing software as Filmora9 recently. This is a comprehensive video editing tool for all user audiences and has many power packed features to work with.
Filmora9 Brief Introduction :
Key features:
- Proxy files to speed up editing high quality videos
- Up to 100 media (video/audio) tracks to create highly customized videos with various effects
- Audio editing features like equalizer, background noise removal and keyframing
- In-built 3D Lookup Tables (LUTs) and professional filters to create high quality videos
- Supports fixing shaky and choppy videos, making it useful for editing GoPro and similar videos.
- Improved Chroma keying compositing features
- Video conversion supported for various playback devices as well as for online video sites.
Visit the official website of Filmora9 and download the free trial version to have a try. I’ll show you how the new Filmora9 video editor looks like and some tricks for using the new version.
This free trial version has watermark to the edited video at exporting while the full version doesn’t.
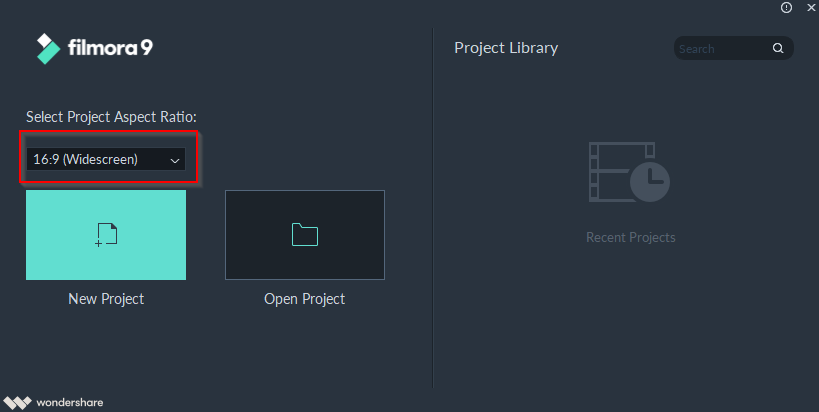
The main screen will have options of either opening an existing project or making a new one. You can also change the aspect ratio from here.
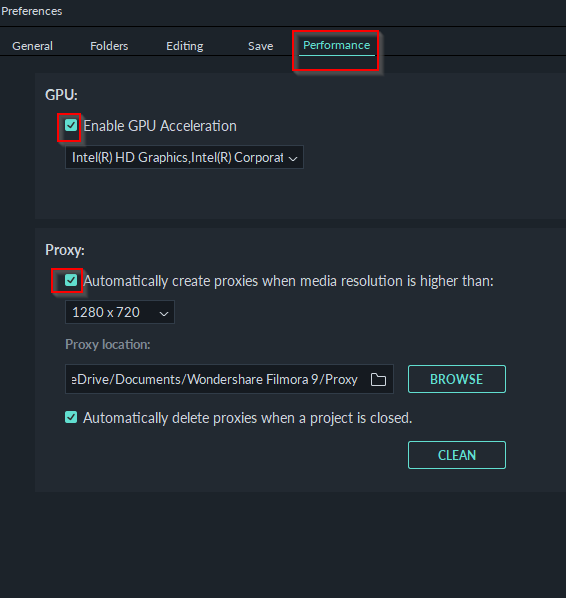
Filmora9 also has an intelligent feature of opting for proxy file when importing the video to be edited. This happens when the source video to be edited is high quality and directly editing it can take some time.
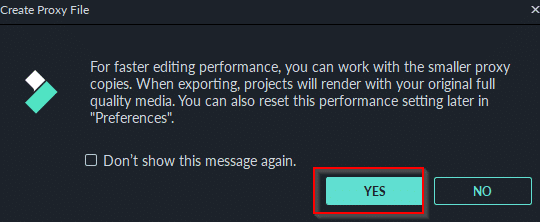
What the proxy feature does is replace the original high-quality video file temporarily with a lower resolution file for the sake of editing so as to speed up the process.
However, once the editing is done, this proxy file is replaced back with the original high-quality file, which means the proxy feature will not reduce the quality of the exported video.
The video editor interface consists of the upper pane consisting of editing elements and lower pane consisting of managing added audio/video tracks.
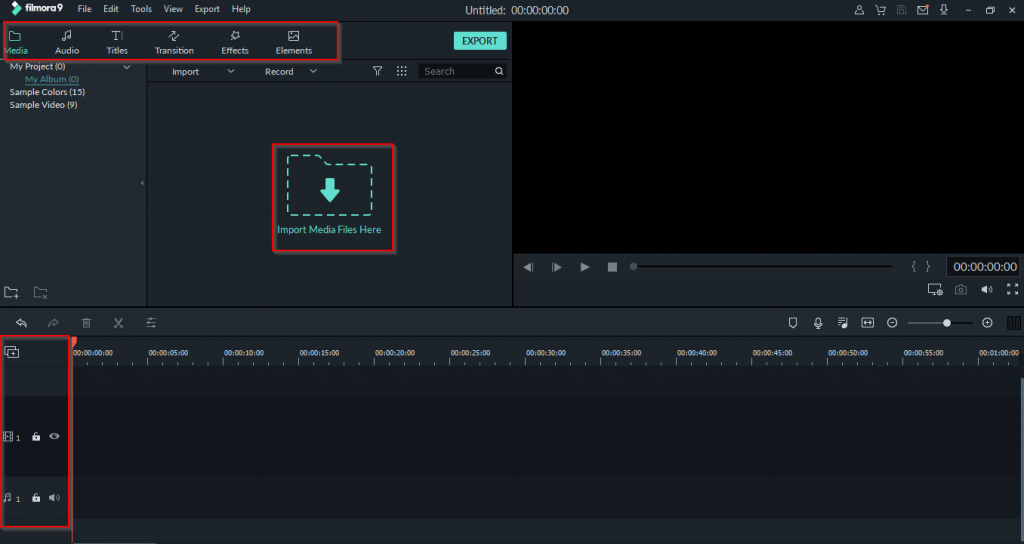
Filmora9 editing elements include Media, Audio, Titles, Transition, Effects and Export. Let’s take a look at each of them.
Note: If you are using Filmora9 (version 9.1 or above), you can get more video effects, video footage, stock photos, and free music and sound effects from the Filmora Stock Shop Filmstocks. You will find video effects and templates for After Effects, royalty free music and sound effects, stock photos and video footage and more in Filmstocks.
Media: Select the input video file to be edited by clicking Import Media Files Here (or through File > Import Media).
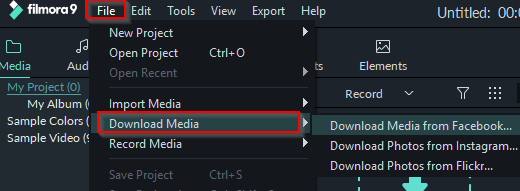
Other than that, you can also download media from your social network accounts like Facebook, Instagram and Flickr. Go to Files > Download Media > Download Media from Facebook.

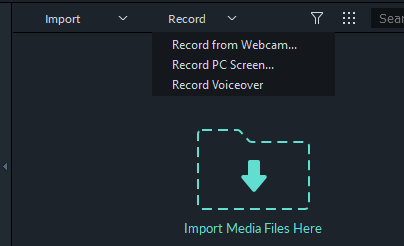
You can also record PC screen, a voiceover or a webcam capture. This is through the Record option.
Wondershare Filmora Scrn will be launched when recording a screencast. This comes in handy for making tutorials.

Also, different audio and video tracks can be added to the existing project. Click the + icon at the left of track interface from the bottom panel and choose Add Video/Audio Track.

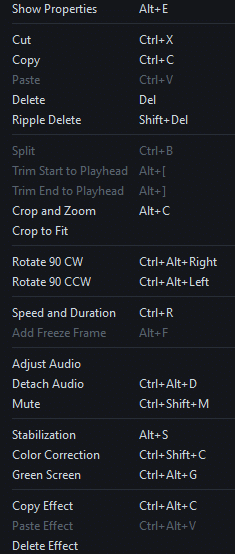
The added video/audio media can be edited with different effects like video stabilization, changing the playback speed, color detection and grading and so on.

Simply choose the specific frame of the track and right click to choose those effects. These can also be accessed directly through Tools.
Audio: Filmora9 has a built-in audio library which includes royalty free music and sound effects. To add a music track, choose from the list of available ones.

They can be downloaded if they have the down arrow symbol next to them. Drag them to the audio layer or choose Apply.

Titles: To add video titles, information or credits, this feature is used.
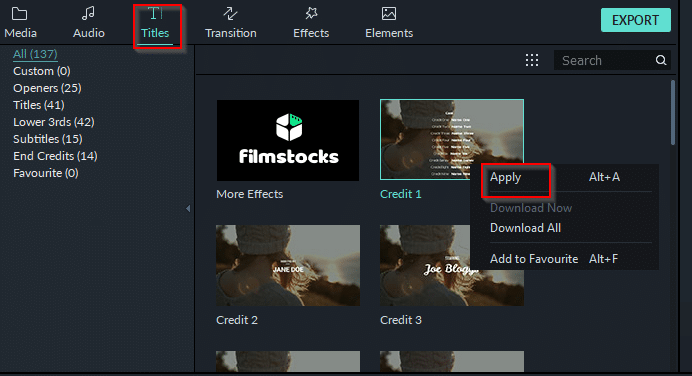
Download from the list of templates available and choose Apply. You can also preview them before selecting.
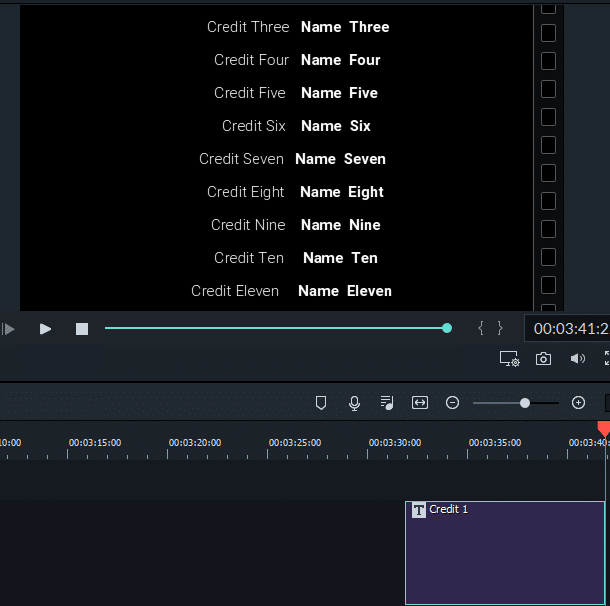
Transition: Various different transition effects can be added from here.

This can improve the overall video playback aesthetics. As with the previous items, select from a list of available templates and add them after previewing.
Effects: Elements This is useful for making video memes or videos with symbols.

Choose from a variety of symbols and logos and the preview video will automatically show the orientation of these in video during playback.
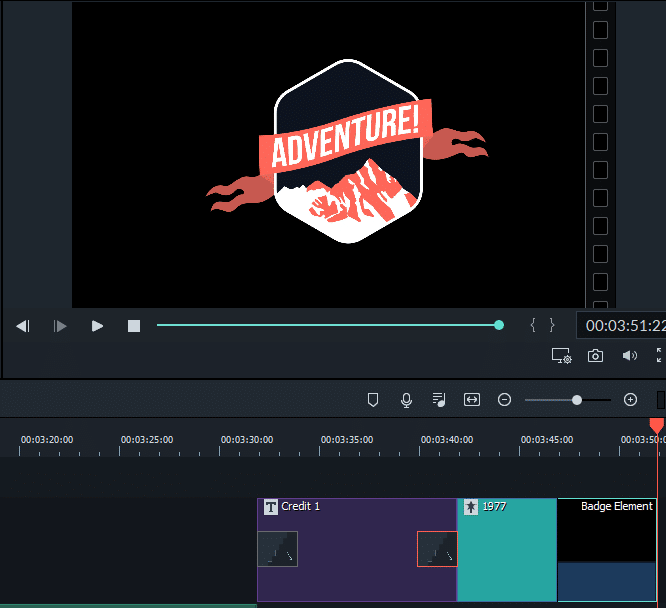
Drag drop the elements to a specific video frame so as to have proper effects.

All the video editing elements in Filmora9 can be dragged-dropped to specific video frames as needed.
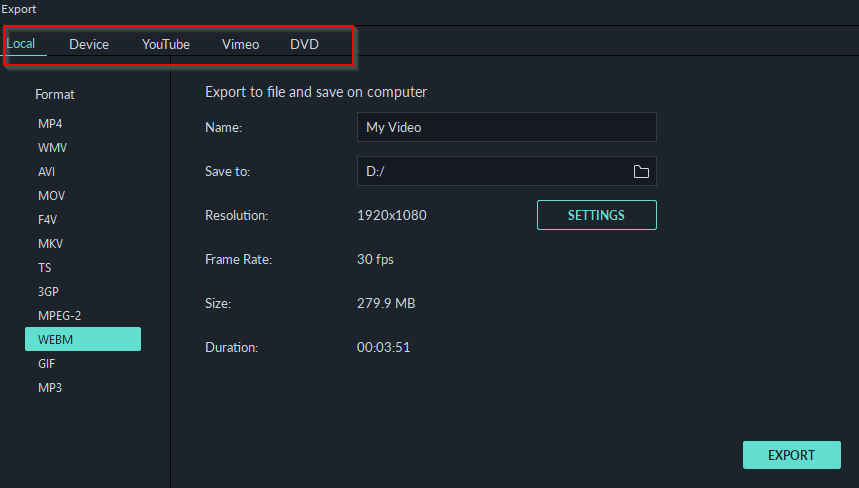
Export: After the video editing is finalized, click EXPORT to save the edited video.

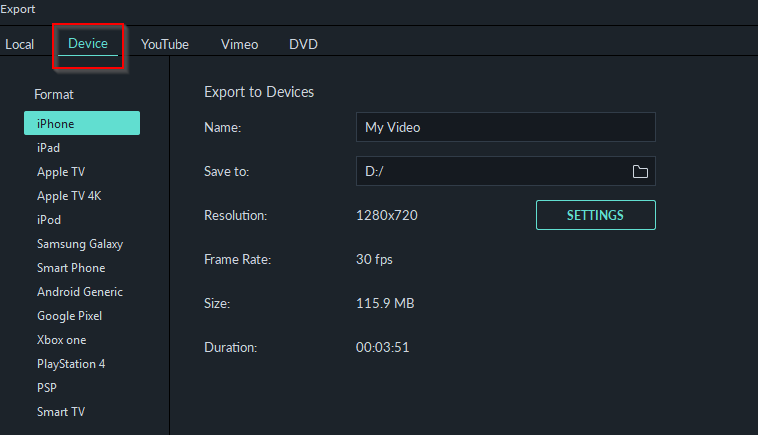
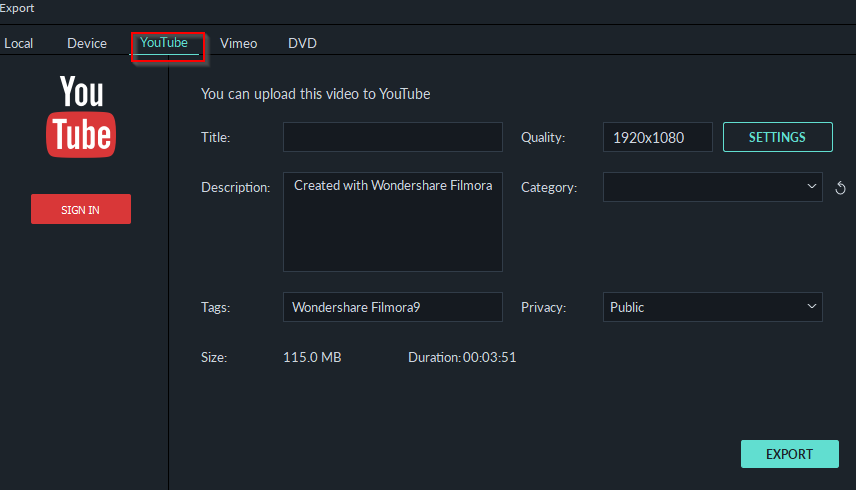
Filmora9 can save it in various formats which also include device specific profiles, online video sharing sites and burning to DVD.
You can then playback the edited video and share it as needed.
Local: This will save the video in other formats like FLV, WebM, AVI and so on.
Device: Useful when optimizing playback on other devices. This includes major mobile device vendors, gaming consoles and TV.
YouTube: Video can be directly uploaded after signing into YouTube. You can also set the visibility options from here.
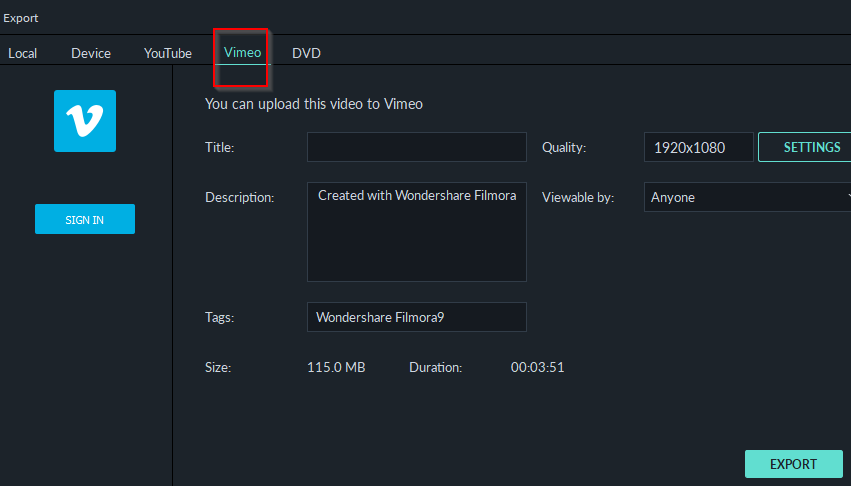
Vimeo: Just like YouTube option, you can sign in to Vimeo and upload the videos there.
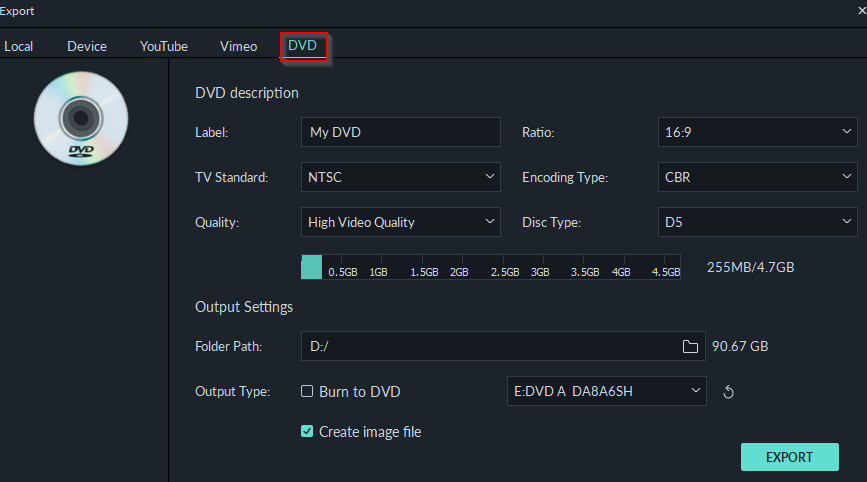
DVD: Videos can be burnt to DVD or be created into an ISO file from here. Options like encoding type, playback quality, aspect ratio and TV standard can be set from here.
Preferences: Filmora9 has useful options that can be configured from File > Preferences.
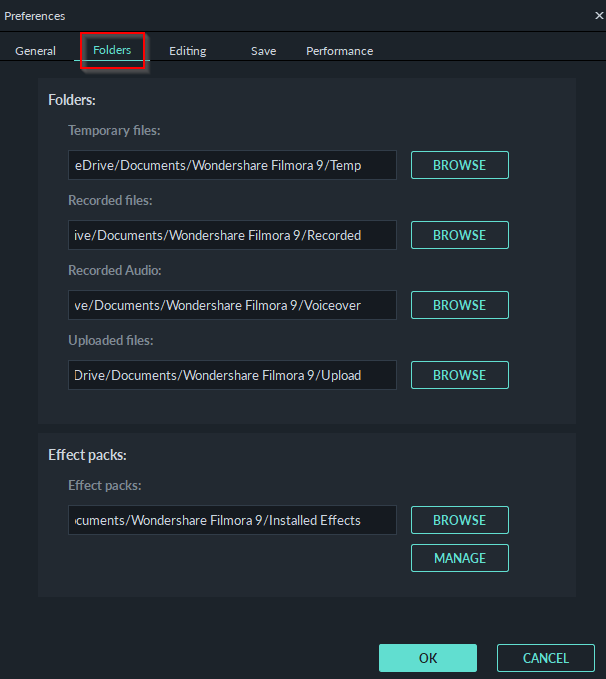
General settings include changing the auto update settings. To change the location where temporary files, effects and recorded audio files are stored, go to Folders section and change from there.
Time duration for effects like the transitions, freeze and so on can be changed from Editing.
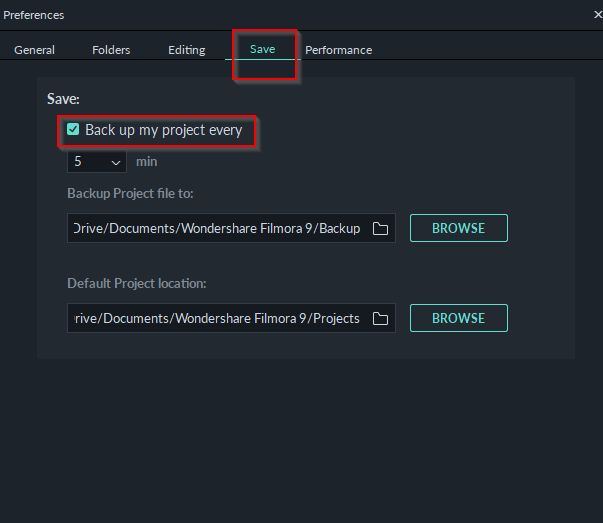
A very useful option is for configuring auto saving and for changing the project path from Save section. By default, Filmora9 autosaves projects every 5 minutes. You can change it to any other time interval with the lowest being 1 minute.
Finally, from the Performance tab, you can enable or disable proxies (temporary video files made for editing at a lower resolution) and enable/disable GPU acceleration.
Editing videos, audio and images using Filmora9:
You can now edit videos and audio files in Filmora9 in an easier way. Just click the clip in the timeline track to enter the editing panel as shown below:
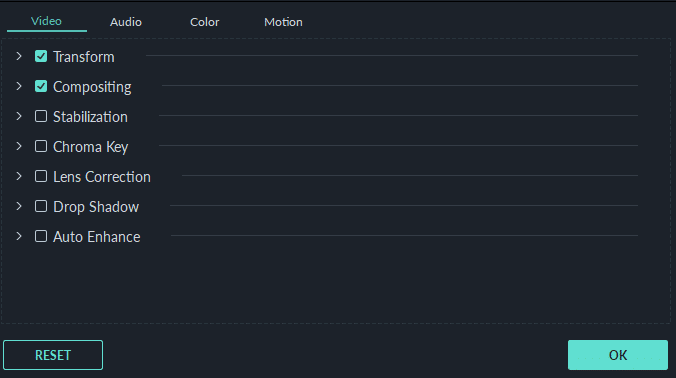
Under the Video tab, you can adjust the transform settings of the clip, like the direction and position, the compositing settings, add drop shadow or fix the fisheye effects in action camera shooting videos. Besides that, you can stabilize video footage and composite a chroma keying footage.
In the Audio editing pane, you can apply fade in and fade out effects, adjust pitch or remove background noise with one click, adjust the audio volume as well.
Filmora9 also features the color grading ability which allows you to adjust white balance, tone, contrast, saturation and more. You can also apply motion effects to the media to make the video more fun.
Though some people say the interface changed a lot, I think Filmora9 allows users to edit videos in a faster way which is a time saving video editing software indeed.
Overall this is an easy to use video editor with a sleek interface that has features without any clutter.
Do try it out.
