Having a local test web development server installed on the PC can be convenient to create and test web projects offline without breaking anything.
XAMPP is a free and useful tool that provides this test environment for all OSes like Windows, Linux, and Mac. Depending on the OS on which the test environment is installed, there can be different setups like:
- WAMP (Windows + Apache + MySQL + PHP)
- LAMP (Linux+ Apache + MySQL + PHP)
- MAMP (MacOS + Apache + MySQL + PHP)
Installing XAMPP for Windows 10/11:
Let’s take a look at how to install and use XAMPP for Windows 10/11:
Download and install the setup for Windows from here.
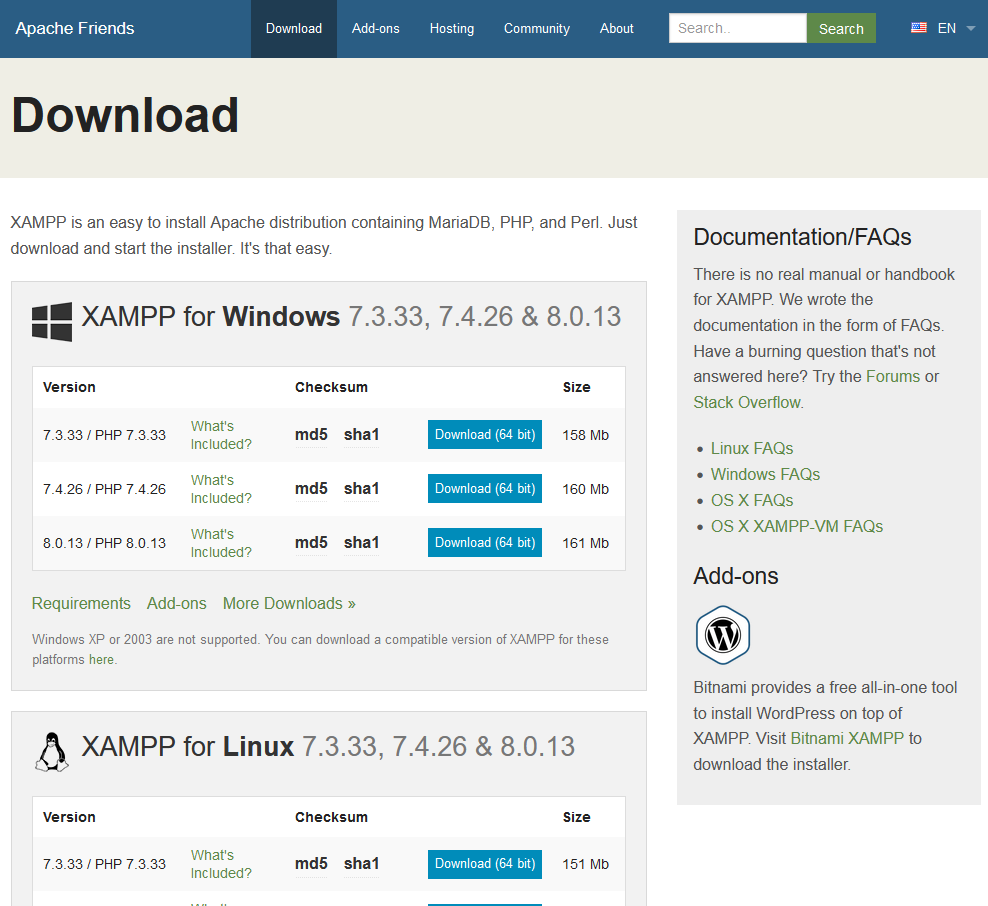
During the installation process, keep the default options enabled.
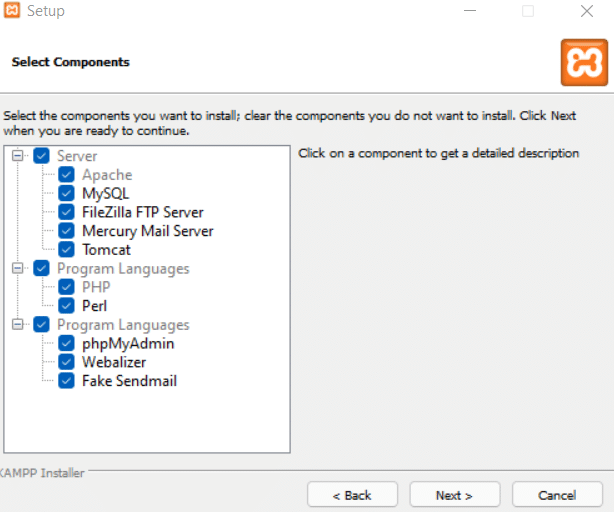
These components will include server-side components like Apache and MySQL and programming languages like PHP and Perl. Continue with the installation. After it is complete, start the XAMPP Control Panel.

Using XAMPP:
The Control Panel is a single interface for managing the WAMP server. You can start and stop various services from here. For starting up the development or test web server, click on the Start button for Apache, PHP, and MySQL.

Other configuration settings include changing the default port numbers for these services, enabling XAMPP auto-start, choosing a default browser and a text editor.
To check if it is running, type any of the following in a web browser:
http://127.0.0.1
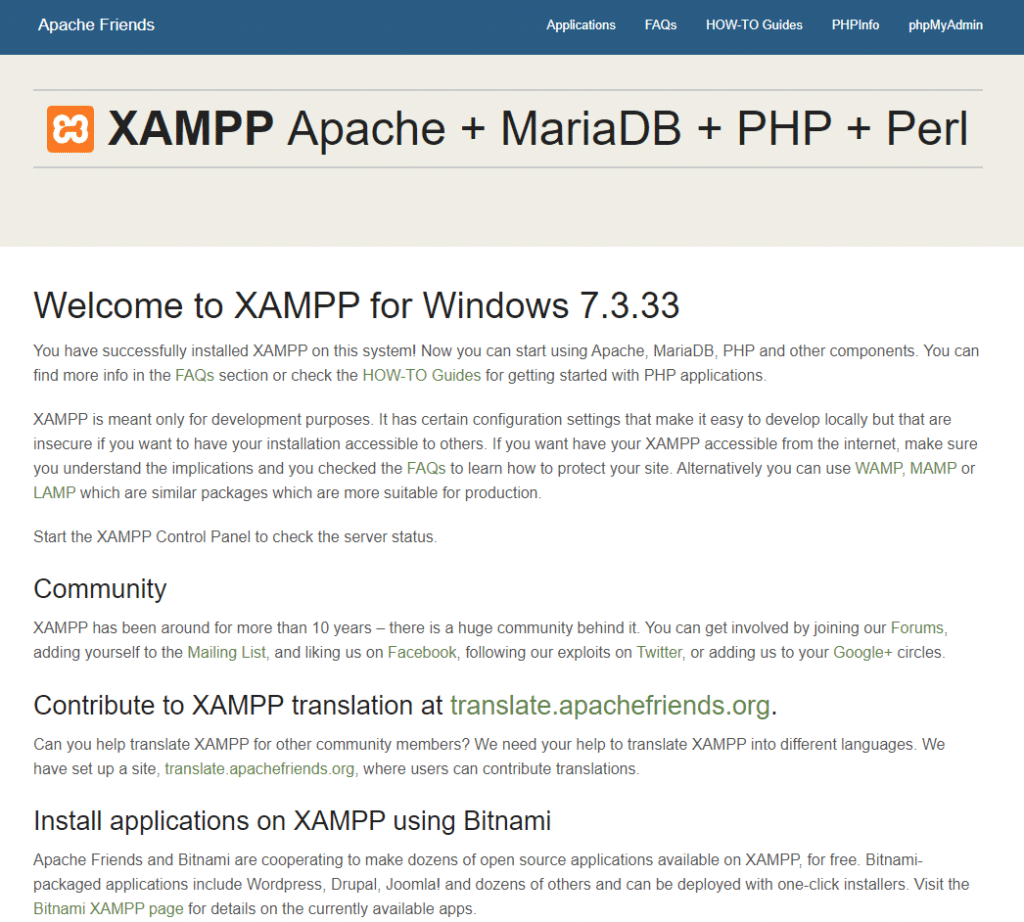
It will display the default XAMPP dashboard.
Creating projects in the document root:
The document root in XAMPP is the htdocs folder in the xampp installation folder.
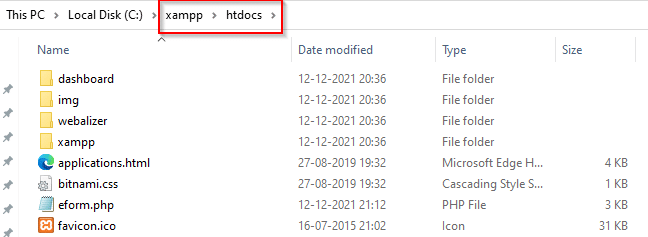
So, to create projects and add new web code for testing, add them in this folder.
Here is a sample test file to check if XAMPP is working normally. Copy-paste the following code in a text editor like Notepad and save it as hello.php with the type as All files (not a text document) in the htdocs folder.
echo “Hello Worldâ€Â;
phpinfo();
?>

This displays a text message (Hello World) and the details of the PHP version that is installed. To load this file, type in the browser:
If all goes well, the output will display something like this.

For managing MySQL, use the phpMyAdmin that is already installed in XAMPP. Type in the browser:
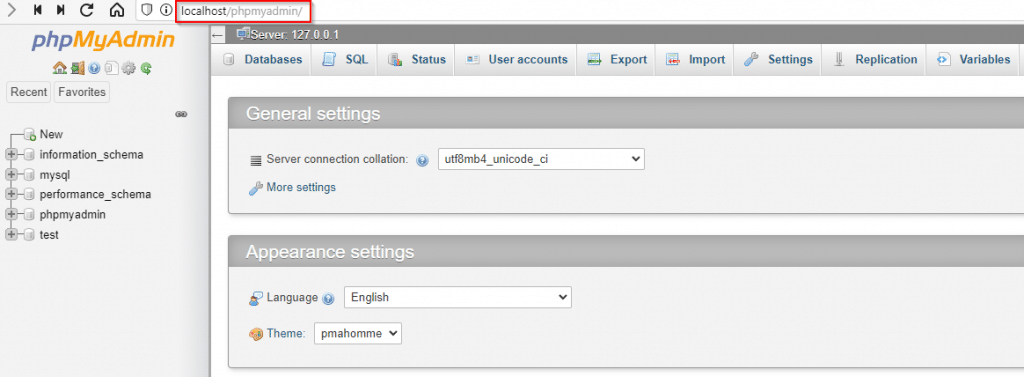
It is a graphical interface for managing MySQL databases. (You can also do it directly from the command line).
The XAMPP Control Panel can be accessed from the system tray too.

Double-click the icon to launch it or right-click to check the running services and start/stop them.

Customizing XAMPP settings:
To view the ports that these web components use, click on the Netstat button from the Control Panel.
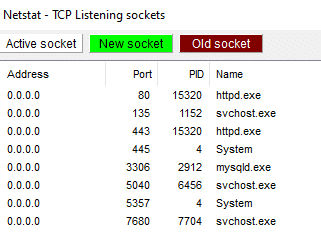
It lists all the processes and their ports with their running status. To automatically start XAMPP modules in Windows and to set a default browser and text editor, click on the Config button.

Then enable the modules which are to be auto-started. The browser and text editor to be set as defaults can be added from here.

Also, if you would like the XAMPP components to use custom ports, click on the Service and Port Settings button. Then change the port numbers for each of them.
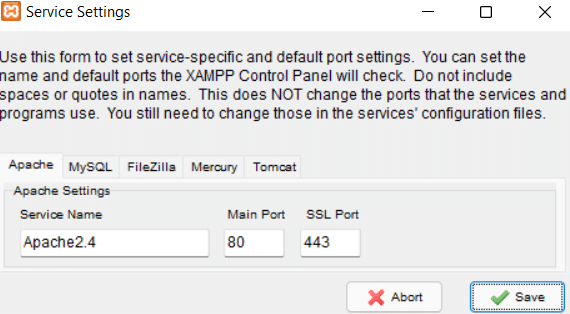
When this is chosen, you have to specify the custom port at the end of the access link. For example: if the default port number for HTTP is changed to 100 instead of the default 80, then to open the dashboard, the URL will be:
Conclusion
XAMPP is a very useful free tool that makes it easy to set up and use a test web environment locally. It is not recommended to install it in a production environment though as a web server.
Do try it out.
Happy web development.
