When deleting, muting, or archiving emails from the Gmail inbox, it can be useful to show the next or the previous message after that instead of returning to the inbox. This is by configuring the auto-advance feature.
Here is how to do that for the web version:
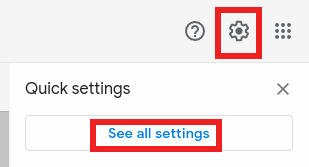
Login to Gmail and click on the gear icon. Then, click on See all settings.

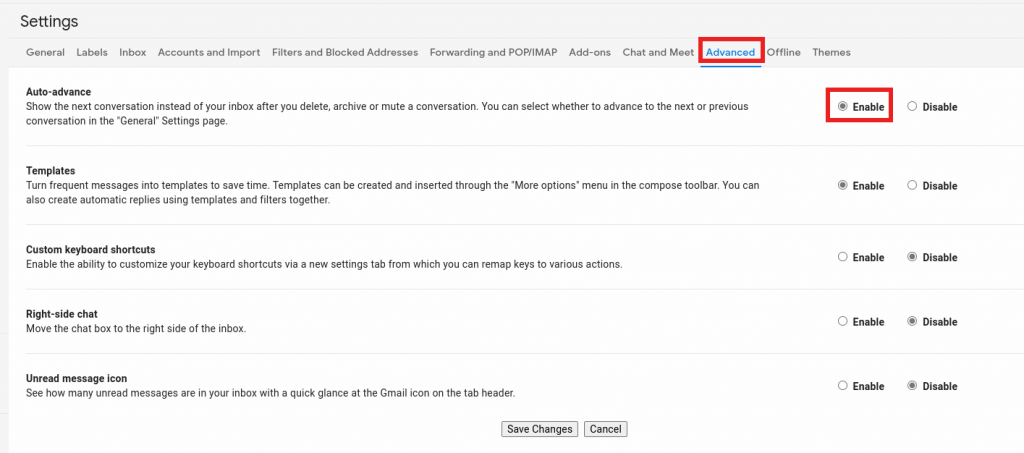
From the settings page that appears, click on the Advanced tab. From here, enable the option of Auto-advance.

Click on the Save Changes button from the bottom of the settings window to save these changes.
![]()
After this is enabled, you can choose whether messages are auto-advanced to the previous message, the next message, or a thread list. The settings for these can be accessed from the General tab. Scroll down to the Auto-advance option in this tab and choose as needed.

Again, click on the Save Changes button from the bottom of the window for these changes to be effective.
From now on, deleting, archiving, or muting Gmail messages will auto-advance to the previous or the next message depending on the options selected, rather than going back to the inbox.
All done.