Syncing in Brave browser involves creating a sync chain using a sync code and then adding devices to this chain. What it means is that to add a device to sync your Brave browsing data with the existing ones, you would first need to add it to this sync chain by entering that code. Here is an earlier article on how to set up this sync chain.
After adding the devices to this sync chain, you can manage these sync settings and remove them from the chain if needed.
To do that, open Brave sync settings by typing in the address bar:
![]()
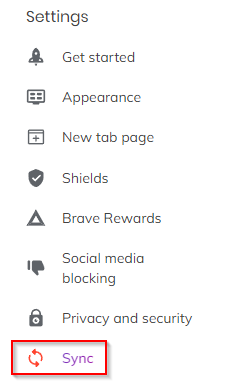
Alternatively, you can go to Brave settings and choose Sync.

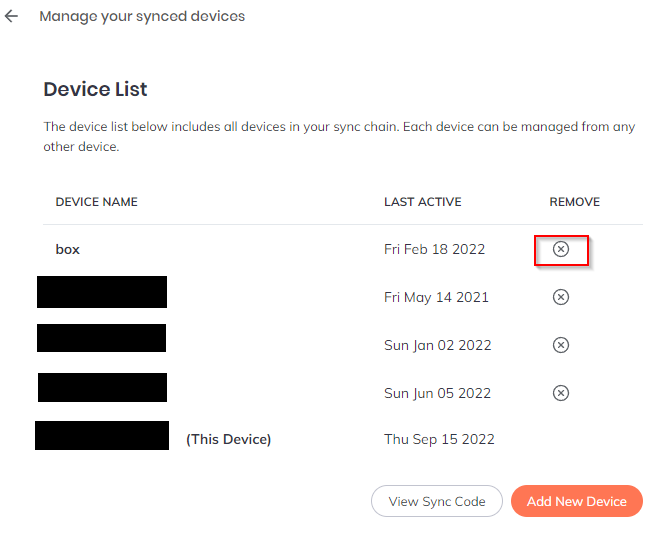
Click on the Manage your synced devices option.

Managing devices in the sync chain:
It will list all the devices that are a part of the Brave sync chain. You can also view the sync code and add a new device to the sync chain from here.

To remove devices from the chain, click on the remove icon next to them. Click on OK to confirm the removal.

It is a good idea to regularly check the devices in the sync chain and remove those which are no longer in use.
Selective sync:
To selectively enable syncing of data in Brave, click on Customise sync from the Sync Settings section.

Then, you can toggle different browsing data like Apps, Bookmarks, Extensions, History, Settings, Themes, and more from being synced. For a consistent browsing experience when using the Brave browser across different devices, the default option of Sync everything is fine.
Finally, to remove the existing device from the Brave sync chain, click on the Leave Sync Chain button from the bottom of the sync settings. It will remove the current device and this device will no longer be getting synced with Brave browser data.
All done.