It can be complicated to manually configure and run backups for Linux servers. Backup Bird is a useful cloud-based backup tool that can back up your servers quickly to different cloud storage providers with just a few clicks. It supports backing up data to FTP/Â SFTP servers, Dropbox, Google Drive, and Amazon S3.

Backup Bird caters to individuals as well as enterprises. The pricing plan for all of these can be found here.

There are three main steps to using it :
- Add the server to be backed up using Backup Bird
- Connect the required backup provider with Backup Bird.
- Configure the schedule and run the backups
Prerequisites:
Backup Bird supports both: Windows and Linux servers. This article describes how to back up an Ubuntu Linux server to Dropbox and Google Drive using Backup Bird. The server has SSH and root access for configuring Backup Bird.
Creating a Backup Bird account and installing the backup agent:
To use Backup Bird, first, create an account from here and log in.

Then, click on Add Server from the dashboard.

As this example uses an Ubuntu server, the operating system would be Linux.

Installing the Backup Bird Linux agent on the server:
For the backups to run, you would need to install the Backup Bird agent on the Linux server to be backed up.

Copy-paste the URL of the Linux agent into the Terminal on the server. Type y to proceed.

Then, verify this installation by clicking on the test button. After the backup agent is installed, the server will now show up in the Backup Bird dashboard.

Then, you can configure the backup settings.
Configuring backup settings:
After the backup agent is installed, go to the Backup Bird dashboard. Then click on Configuration.

There are different options to choose from.
Files & Directories: Enter the absolute path of the files and directories that are to be backed up.
Databases: Add the databases if any to backup by clicking the Add new database button.
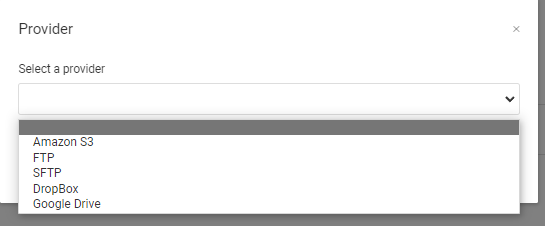
Providers: Backup Bird seamlessly integrates with most of the major cloud providers like Amazon S3, Dropbox, and Google Drive where you can backup your data. So this option is for adding them. Click on the Add new provider.
From the drop-down for providers, choose one.

FTP: When FTP is chosen, you would need to enter the FTP server details and the login credentials.

Dropbox: Connecting Dropbox to Backup Bird would need a secure token. Click on the link to get the token.

Then, copy-paste the token link and click Ok.

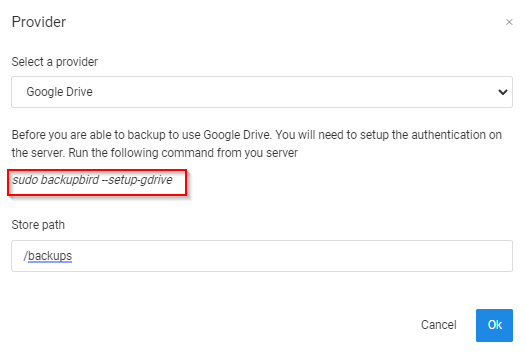
Google Drive: For using Google Drive with Backup Bird, you would first need to enable authentication for it on the server.

So, open the Terminal on the server and run the following command:

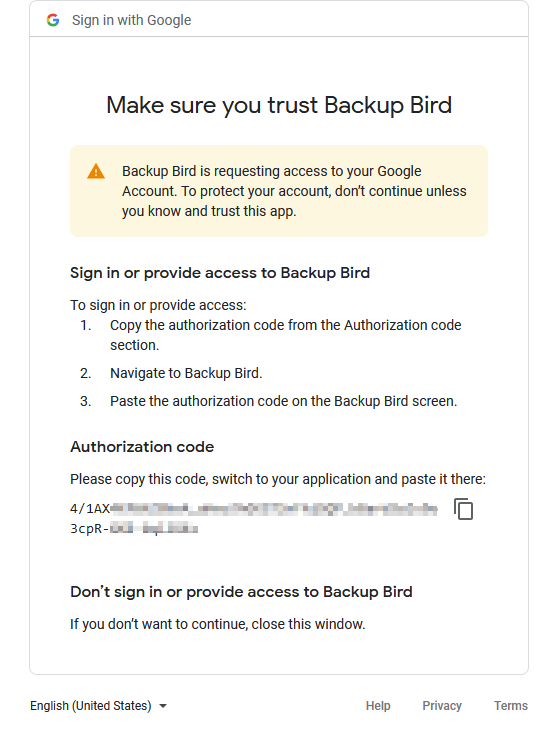
This generates an authentication link. Copy-paste this into the browser and allow Backup Bird access to Google Drive using the authorization code that is displayed in the authentication window.


If all goes well, you will see Google Drive successfully connected to Backup Bird.
Amazon S3: Choose the S3 details like Region, Bucket, Access key, and more to finish connecting it with Backup Bird.

Advanced options: Clicking on this will let you customize further backup settings like file exclusions, temporary backup path, custom prefixes, and suffixes for the generated backup and backup retention period.

After the backup settings are saved, review them. Schedule when the backup will run by clicking the Schedule link.

Set the backup days and times as needed. Click Save schedule to save these settings.

It is always a good practice to get all backup-related notifications. These can be set from the Notifications section.

Enable them for both – failed and successful backups.
Server settings: This section is for changing the server name and server IP if it is changed.

You can also deactivate the server or delete it from here.
Running the backup:
To manually back up the server using Backup Bird, click on the Backup Now button.

Click OK to confirm and proceed with it.

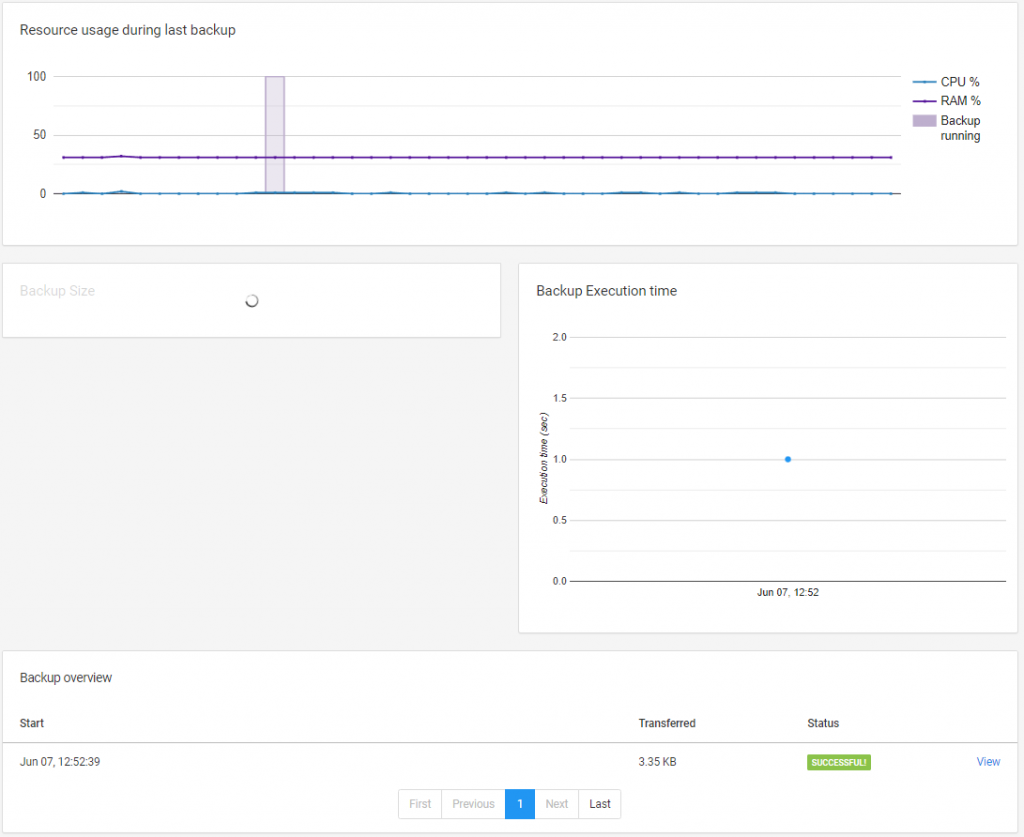
From the Overview section, Backup Bird neatly shows various graphs like resource usage, backup execution time, and an overview of the backup.

Viewing backup logs:
The Dashboard also shows the last backup status.

Click on the more option to view the backup logs.

The logs will show the backup start time, duration, backup size, destination path where the server is backed up, and the files that are backed up.

In this example, the server was backed up to Dropbox and Google Drive. So logging into them would show the generated backup.

Overall, once you connect the desired providers and configure the backup settings, you can easily backup Linux servers to popular cloud storage services like Google Drive and Dropbox with Backup Bird through a few clicks. Do try it out.
Happy backing up.
