Database recovery can be a complex process that requires careful planning and execution. When a database experiences a failure, whether due to hardware issues, software errors, or human error, it is crucial to have a plan in place to restore the data and get the system back up and running as quickly as possible.
Fortunately, with Stellar Repair for MySQL, is used for repairing the corrupt MYSQL databases. In addition, this process becomes easy, and you can get database up and running quickly.
Features of Stellar Repair for MySQL:
- Easy to use point and click interface without a steep learning curve.
- Repair all types of MySQL errors right from the simplest to the complex ones with just a few clicks.
- Repair MySQL/MariaDB databases and gracefully recover all the database items from them.
- Stellar Repair for MySQL also repairs databases created on Linux systems including Ubuntu, CentOS, and Red Hat Enterprise.
- Repair databases created using InnoDB and MyISAM to their original state.
Installation:
Installing Stellar Repair for MySQL is simple. It is a standalone MySQL database repair tool for Windows that lets you fix corrupted databases quickly.
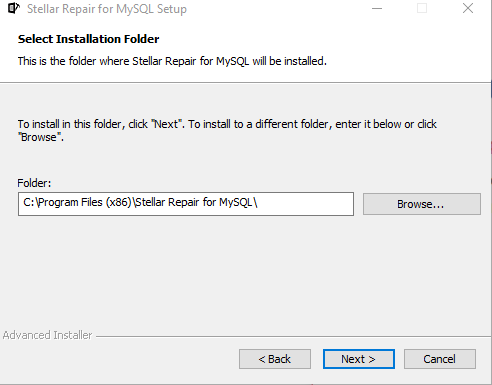
Double-click the setup and follow the on-screen instructions. By default, it will be installed in the Program Files folder.
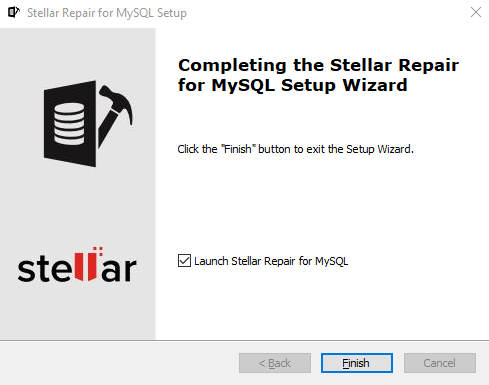
On completing the installation, open Stellar Repair for MySQL.
How to use Stellar Repair for MySQL:
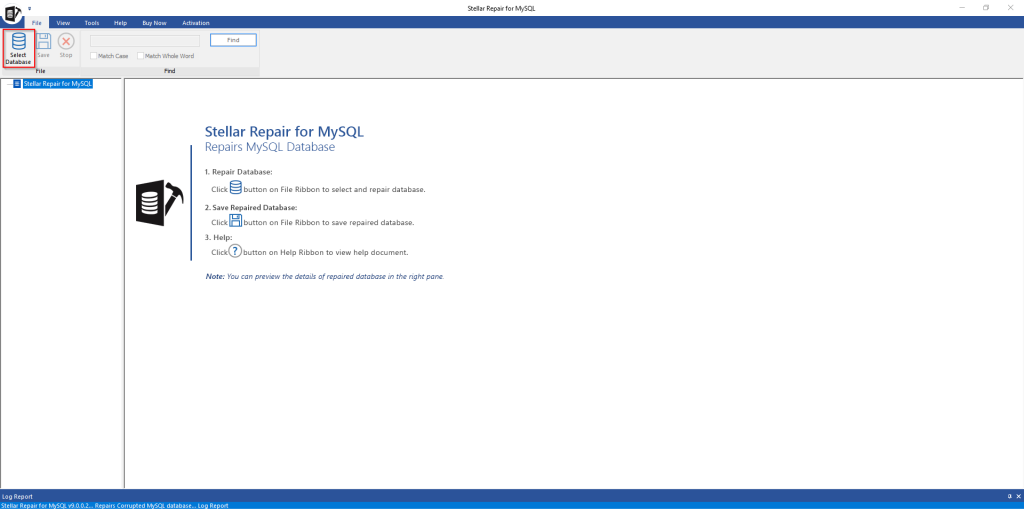
The process to start repairing databases with Stellar Repair for MySQL is simple and doesn’t require much technical know-how. The main interface is point-and-click and requires you to select the source database to get started with the repairing process.
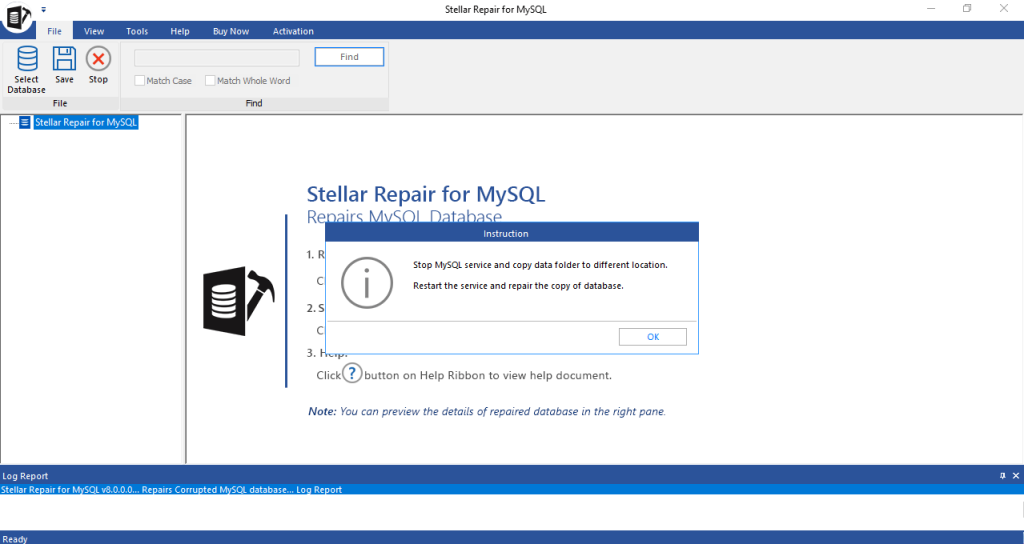
If there is a live database to be repaired, then, it needs to be taken offline. It is also recommended to copy the live database to a different folder before repairing.
Also, if you want to repair a database from a Linux system, first copy it to the Windows system where Stellar Repair for MySQL is installed.
After that, select the folder path of the database to be repaired.
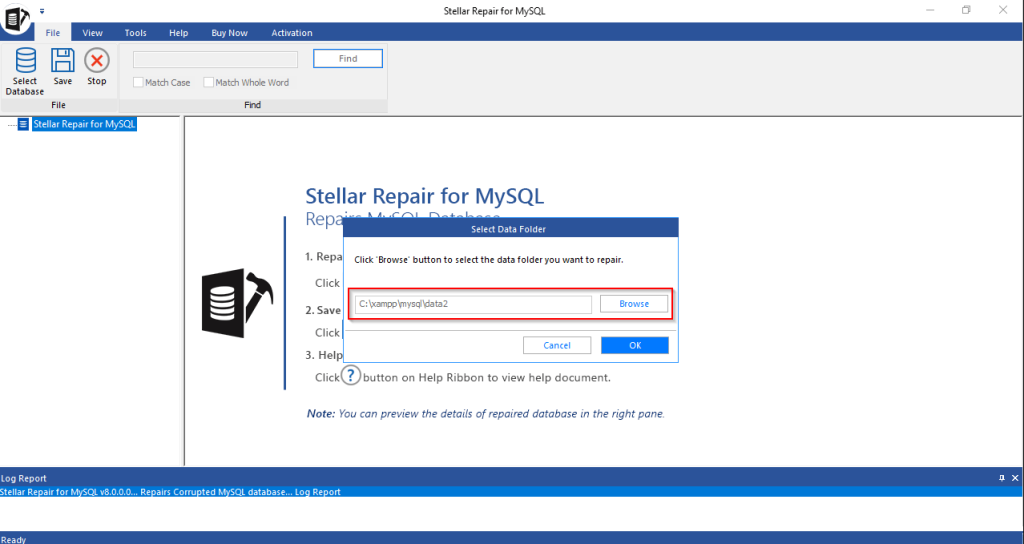
Stellar Repair for MySQL will now show the different databases to be repaired.
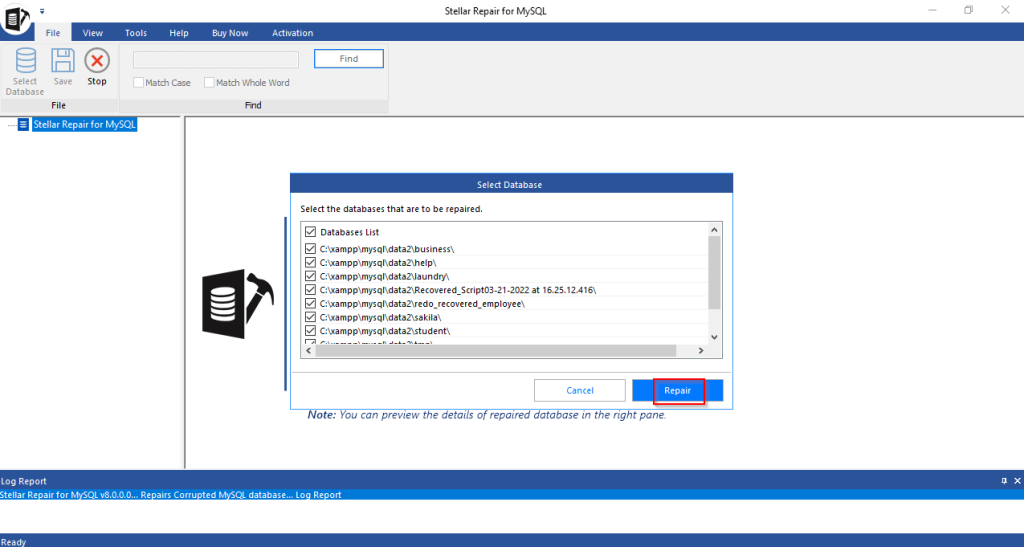
Choose from the list as needed and click the Repair button.
Depending on the size of the database, the repairing time will vary. Once repaired, you will be able to preview the database contents.
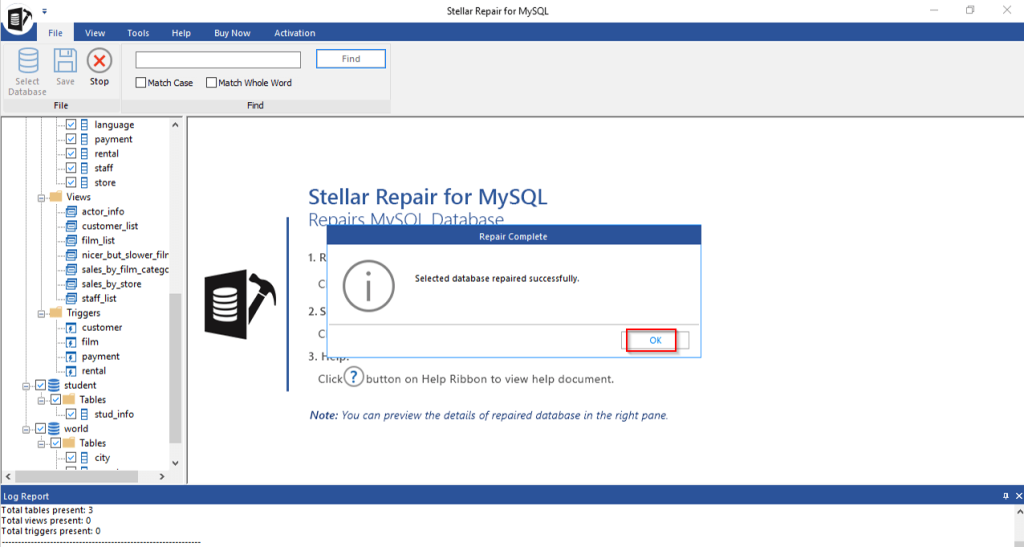
The preview pane on the right will show the different items on the right after repairing. After confirming that the database contains the necessary items, you can now restore it by clicking on the Save button.
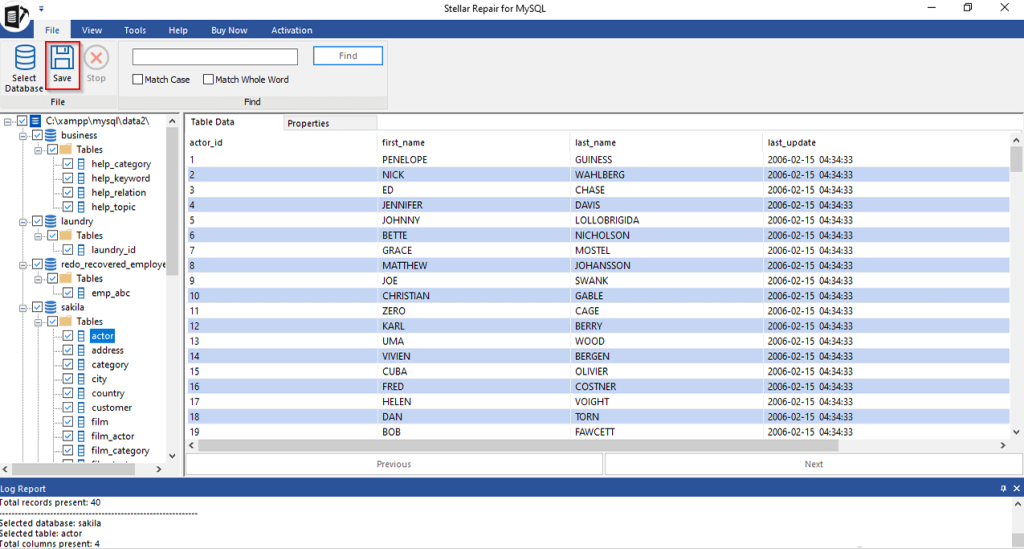
It can be saved as any of the following formats: MySQL, MariaDB, HTML, SQL Script, CSV and XLS.
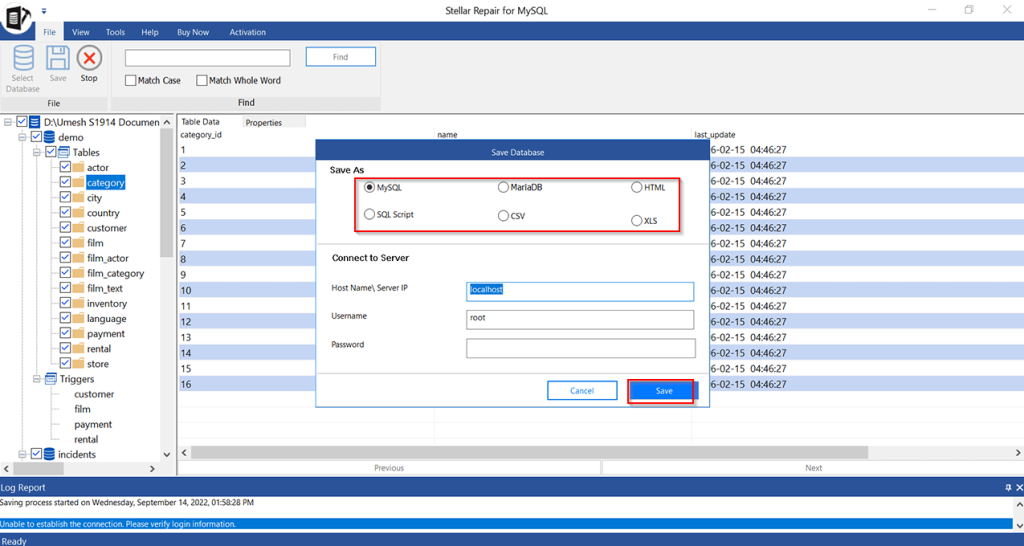
You can also connect to the MySQL server (if it is running on the same system) and directly save the database.
A confirmation message will appear indicating that the save is successful.
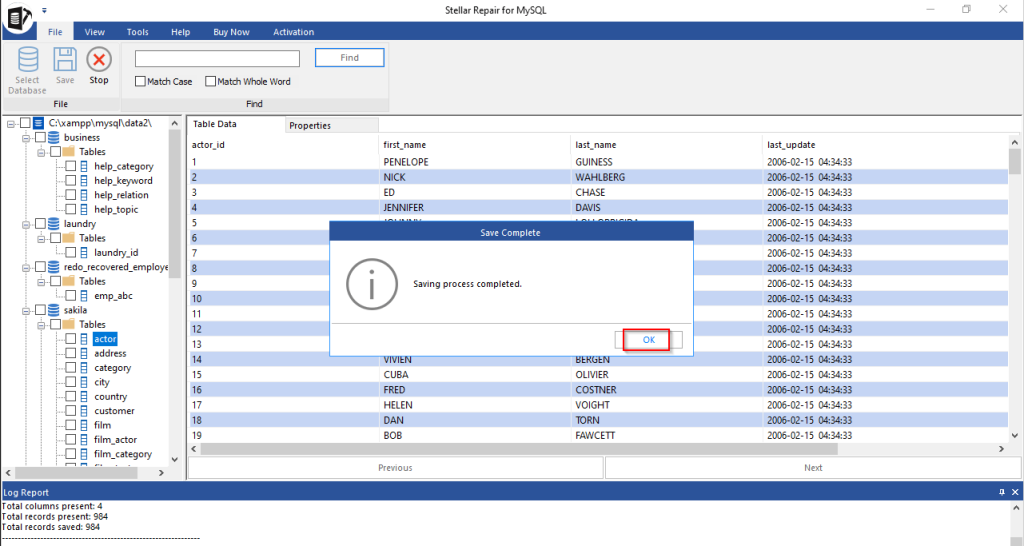
So, the database is now repaired and fully restored.
Activating and Updating Stellar Repair for MySQL:
If you have already purchased a license of Stellar Repair for MySQL, then click on the Activation tab from the menu.
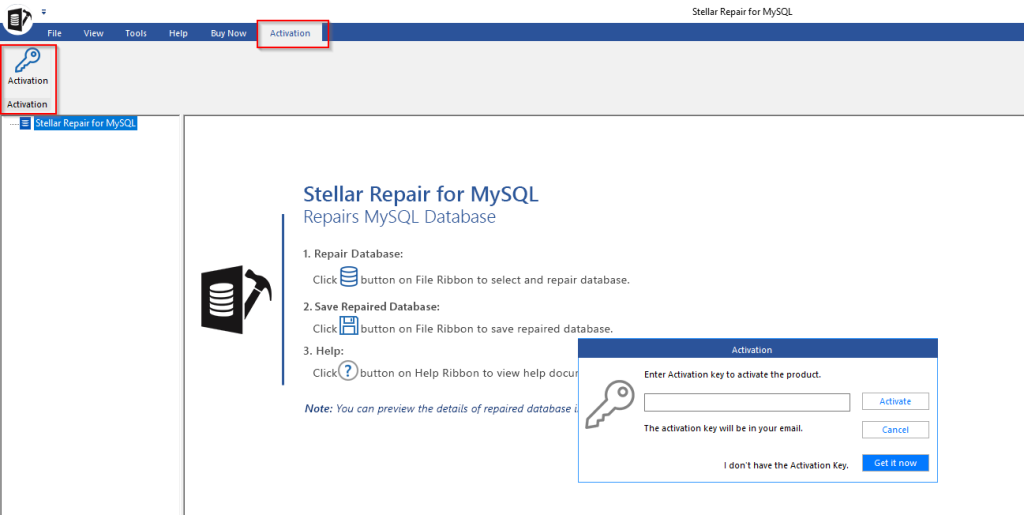
Then, enter the license key and click on Activate.
To check for new updates to Stellar Repair for MySQL, click on Tools > Update.
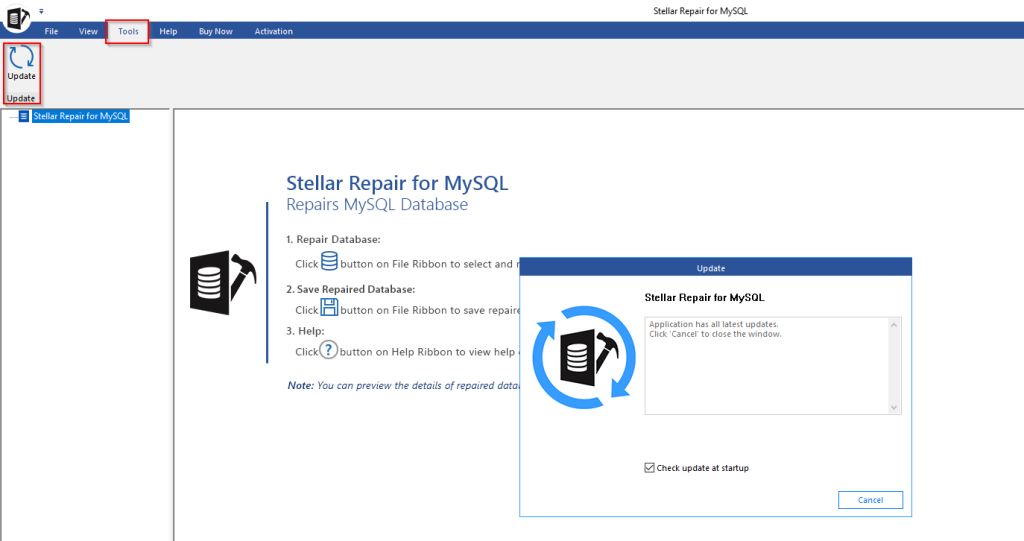
It will check if any updates are available to download and install thereby ensuring that you always are using the latest version.
Conclusion:
Overall, this is a useful standalone tool for repairing databases. You don’t need a steep learning curve either for using Stellar Repair for MySQL.
Do try it out.
