
When troubleshooting network issues in Windows, you’ll often encounter three command-line tools: ping, tracert, and pathping. While they all deal with network connectivity, they serve distinct purposes.
Let’s break down each command and understand their differences.
1. Ping: The Basic Connectivity Test
ping is the simplest and most commonly used network diagnostic tool. It sends an Internet Control Message Protocol (ICMP) echo request to a specified host (IP address or domain name) and waits for a response.
What it does:
- Checks basic connectivity: Determines if a host is reachable.
- Measures round-trip time (RTT): Shows how long it takes for a packet to travel to the host and back, measured in milliseconds (ms).
- Packet loss: Indicates if any packets were lost during transmission.
How to use it:
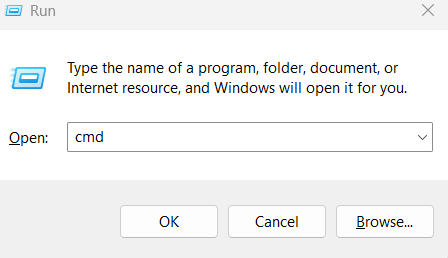
Open Command Prompt (search for “cmd” in the Start menu):
In the command prompt, type:
ping ihaveapc.com
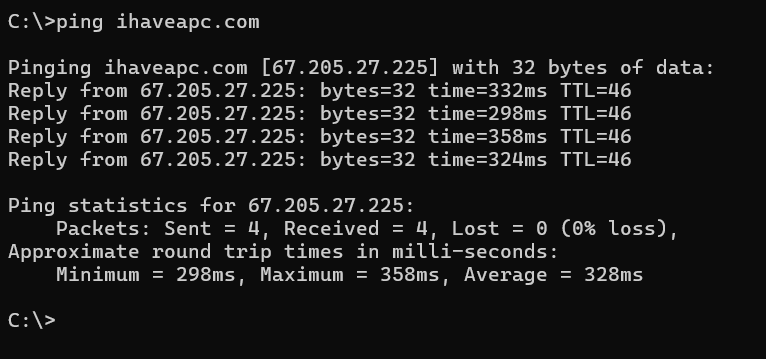
What the output tells you:
- Successful responses indicate connectivity.
- High RTT values suggest network latency.
- “Request timed out” or “Destination host unreachable” indicates connectivity issues.
2. Tracert (Trace Route): Mapping the Network Path
tracert (trace route) traces the path that a packet takes to reach a destination. It shows each router (hop) along the way, along with the RTT for each hop.
What it does:
- Identifies the route: Shows the sequence of routers a packet traverses.
- Pinpoints network bottlenecks: High RTT values at specific hops can indicate network congestion or problems.
- Helps locate where connection is failing: Identifies the point where a connection is lost.
How to use it:
In the Windows command prompt, type:
tracert ihaveapc.com
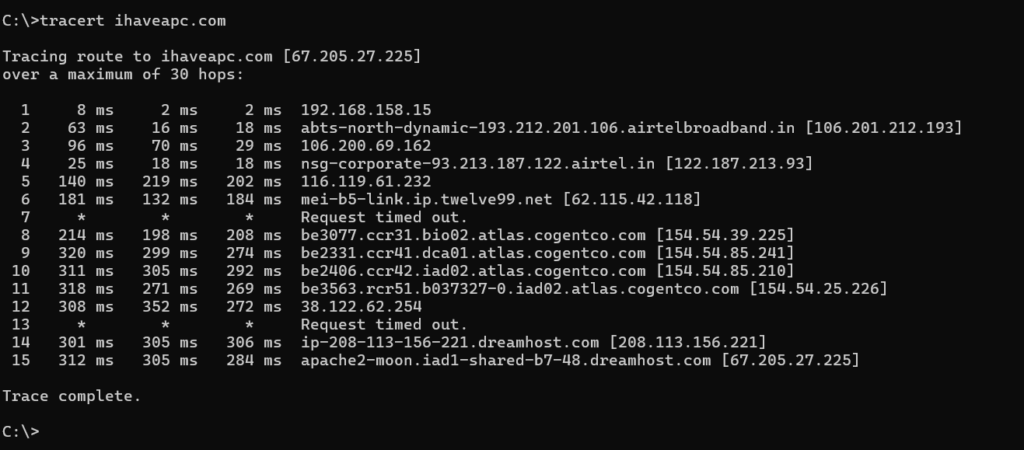
What the output tells you:
- A list of routers (IP addresses or hostnames) along the path.
- RTT values for each hop.
- “Request timed out” at a specific hop indicates a potential problem or latency/firewall blocking.
3. Pathping: Combining Ping and Tracert with Statistical Analysis
pathping is a more advanced tool that combines the functionality of ping and tracert and provides statistical analysis of packet loss at each hop.
What it does:
- Traces the route: Like tracert, it displays the path to a destination.
- Analyzes packet loss: It sends multiple pings to each hop and calculates the percentage of packet loss.
- Identifies network congestion: Shows which hops are experiencing packet loss, indicating potential network congestion or instability.
- Longer test time: Pathping takes longer to complete than ping or tracert, as it gathers more data and generates statistics for150 seconds before showing them.
How to use it:
In Command Prompt, type:
pathping ihaveapc.com
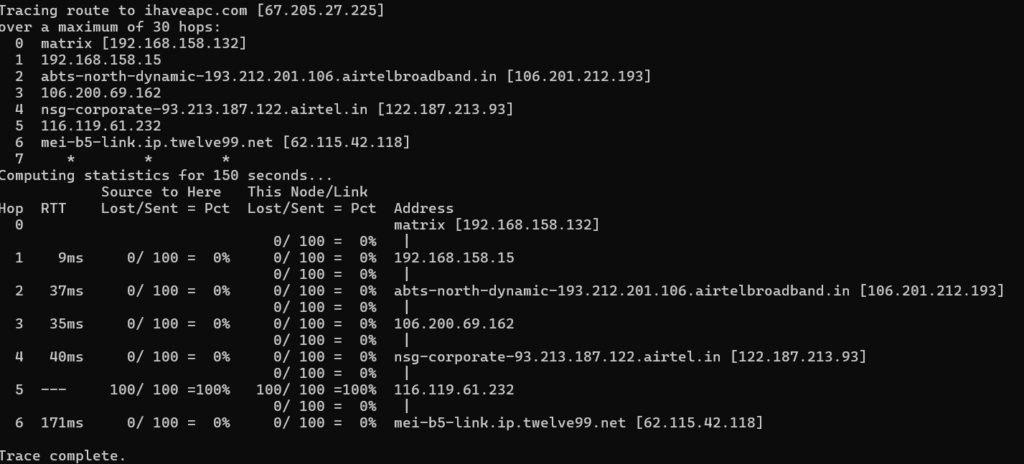
What the output tells you:
- A list of hops with RTT and packet loss statistics.
- “This Node/Link may be congested/lost packets” indications.
- A summary table at the end showing statistics for each hop.
Key Differences Summarized:
- Ping: Basic connectivity and RTT check.
- Tracert: Traces the network path and identifies hops.
- Pathping: Traces the path and provides detailed packet loss statistics for each hop.
When to Use Which:
- Use ping for a quick check of basic connectivity.
- Use tracert to identify the route and locate potential bottlenecks.
- Use pathping for in-depth network diagnostics and to pinpoint packet loss issues.
By understanding these three commands, you can effectively diagnose and troubleshoot network problems in Windows.
Happy troubleshooting.
All done.