Recordit: An Easy to Use Screen Recorder
Recordit is a user-friendly tool designed for capturing screen and sound for various activities like gaming, tutorials, video calls, demos, and live streams.
Key Features:
- Easy to use minimalistic interface
- Record video, audio and take screenshots
- Supports custom selection like full screen, region and window
- Export video recordings to various formats like MP4, AVI, FLV, GIF, MP3 and more
- Save screenshots as PNG and JPG
- No technical know-how needed for creating video and audio recordings
- Supports Windows and Mac platforms.
The free version of Recordit has some limitations compared to the premium version. You can still record up to 10 minutes of video with it and can export it (with watermark). Pricing plans can be found here.
Installing Recordit
Download and install Recordit. The installation is straightforward and you can keep the default settings during the setup.


Once Recordit is installed, launch it.

Using Recordit
The interface is simple and intuitive to use.

Recordit consists of 3 core features:

- Recording: Record video and audio from here.�
- Screenshot: Take a screenshot of still images.�
- Files: Manage video and image captures from here.�
Let’s take a look at each of these:
Recording:
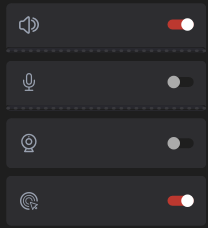
You can record audio and video through this. This can either be full screen, region or window. You can also set custom ratio, width and height for your video recordings.

Other settings for these recordings include toggling microphone on/off, webcam on/off and mouse pointer on/off.
Also, you can save these video recordings in different formats which are available from the drop down lost.

Change the default file path where these are stored using the File Location button. Naming the file is optional as Recordit by default saves it with the recording date and time stamp.

To record full screen, click the Full Screen option. Then click the Start Recording button.�


After a short countdown the recording will start with the recording window visible.�
You can stop the recording at any time by clicking the red button at the top of the recording window or by pressing the F9 key.
Files:
The captured recording will be available in the Files section.

You can click the folder icon next to it to open the location where it is stored or delete it through the trash button.
All recorded captures (video, audio and screenshots) can be accessed through the Files section.
Select Region: This is useful when you need to highlight a specific area in your recording.
Choose the region/area on your screen using the crosshair selection box and record it.
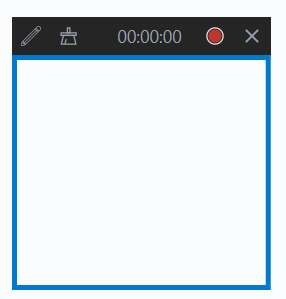
Recordit makes recordings interactive with the built-in drawing tool. Click the pencil icon from the top left of the recording screen and you can dribble and doodle in your recordings.

Pretty cool.
Select Window: Use this option when you need to record a specific window. The outline of the selected window will turn red. You can then start recording just like the way it is in region and full screen.This is great for making walk-throughs and troubleshooting guides.
Screenshot: As Recordit also has a built-in screenshot tool, you can use this to take image captures of your screen.

Click the camera icon to capture the screenshot. As with region capture, you can use the edit button to annotate screenshots.
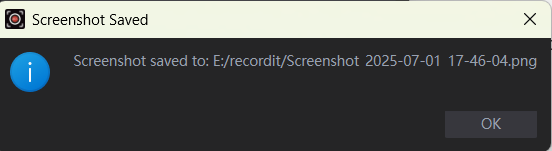
It supports saving these images in both PNG and JPG formats.�
Configuring Recordit Settings
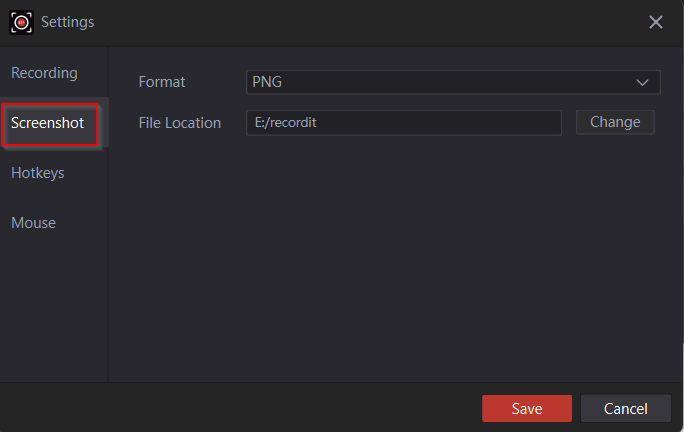
To configure different settings for Recordit, click the gear icon from the top right of the interface screen.

There are different settings that you can configure:
Recording: Change the video format and file location of the video captures from here.

Screenshot: Similar to video recordings before, change the image format and the location of captured screenshots.
Hotkeys: The default hotkeys (F9 and F10) for starting/stopping recordings and taking screenshots respectively can be changed using this setting.

Mouse: Toggle capturing mouse cursor/pointer and effects through this setting.

Other settings
You can change the interface language, check for updates and register your Recordit license key by clicking the burger icon from the top-right corner of the interface.

Overall this is an easy to use screen recorder which is also light on the system resources.
Do try it out.
Happy recording.