Here’s how to create a ‘Lock PC’ shortcut in Windows 7:
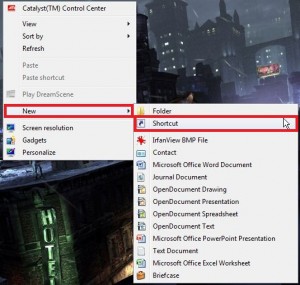
1. Right click on the desktop and select ‘New>Shortcut’.
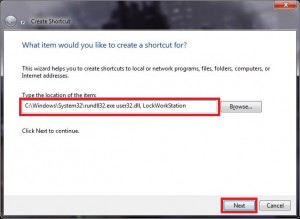
2. Copy paste the following in the location field –
C:\Windows\System32\rundll32.exe user32.dll, LockWorkStation
Click ‘Next’ when done.
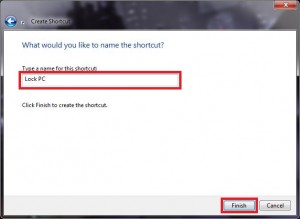
3. Type a name for the shortcut, say, ‘Lock PC’.
Click ‘Finish’ when done.
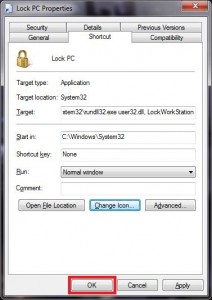
4. A ‘Lock PC’ shortcut will now appear on the desktop. Right click the shortcut and select ‘Properties’.
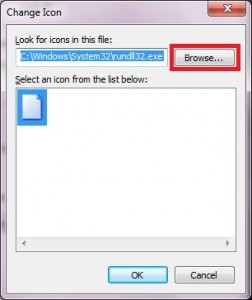
5. Click on ‘Change Icon’.
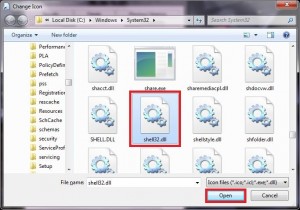
6. Click ‘Browse’.
7. Select ‘shell32.dll’ and click ‘Open’.
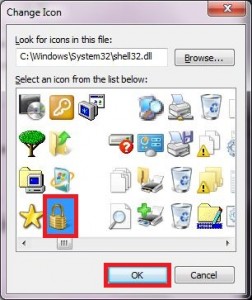
8. Now, select an icon of your choice and click ‘OK’.
9. Click ‘OK’.
10. All done. You have successfully created a ‘Lock PC’ shortcut on your desktop. Double click the shortcut at any time to lock the PC. Note that this tip will also work in Windows XP and Windows Vista.




What’s wrong with pressing key and ‘L’ ? Does the same thing.
[…] This post was mentioned on Twitter by AVP, ihaveapc. ihaveapc said: How To Create A ‘Lock PC’ Shortcut In Windows 7 http://goo.gl/fb/ZLL6P […]