How to Setup a Digital Legacy Account in OneDrive
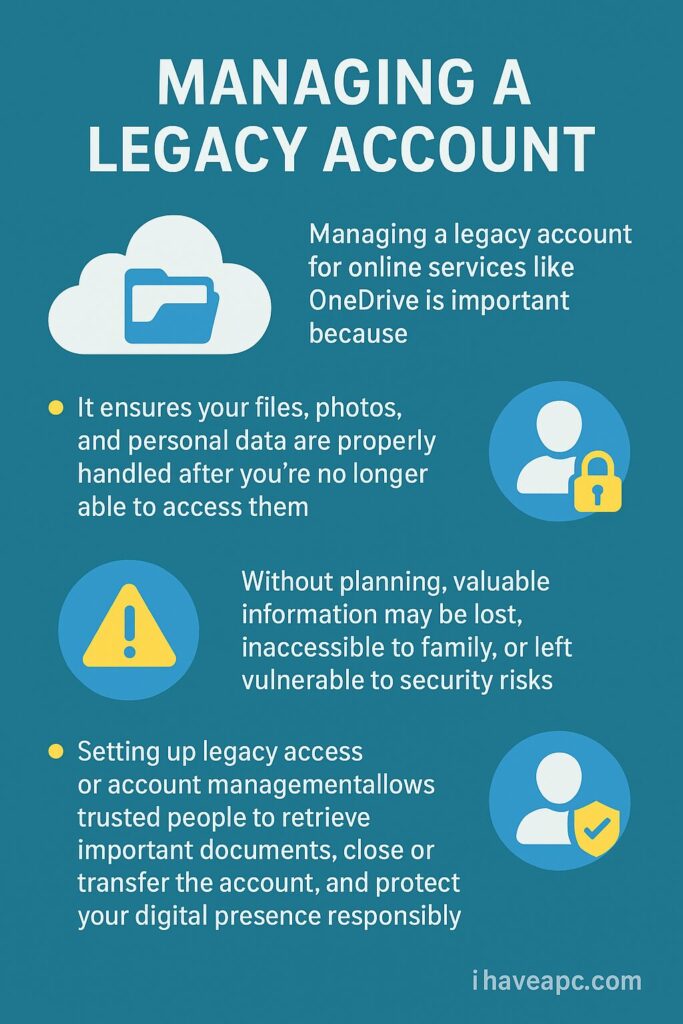
Managing a digital legacy account for online services like OneDrive is important because it ensures your files, photos, and personal data are properly handled after you die or when you can’t access them.
Here is the process overview to setup digital legacy for OneDrive accounts:
Creating and responding to the invitation
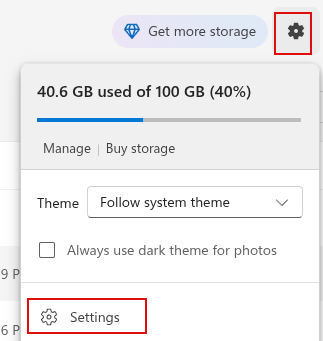
Open OneDrive web and click on the gear icon to access Settings.
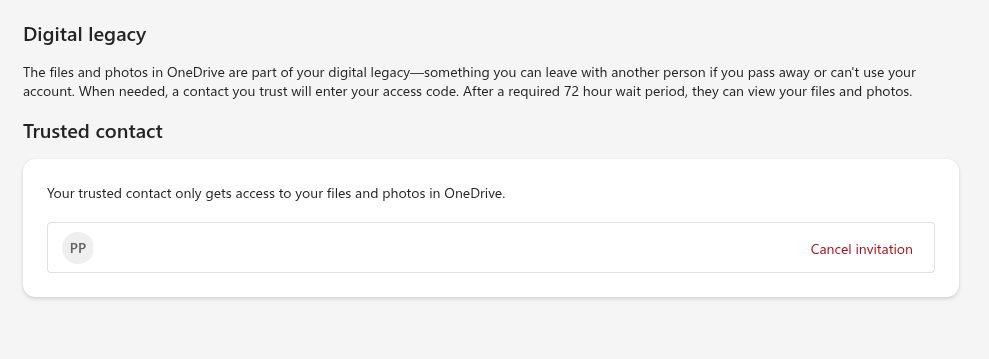
From the Options section, click on Digital legacy.
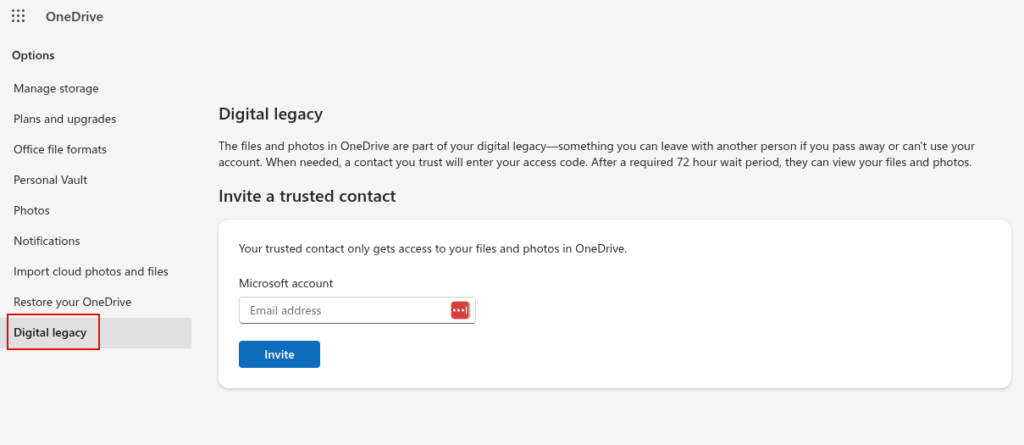
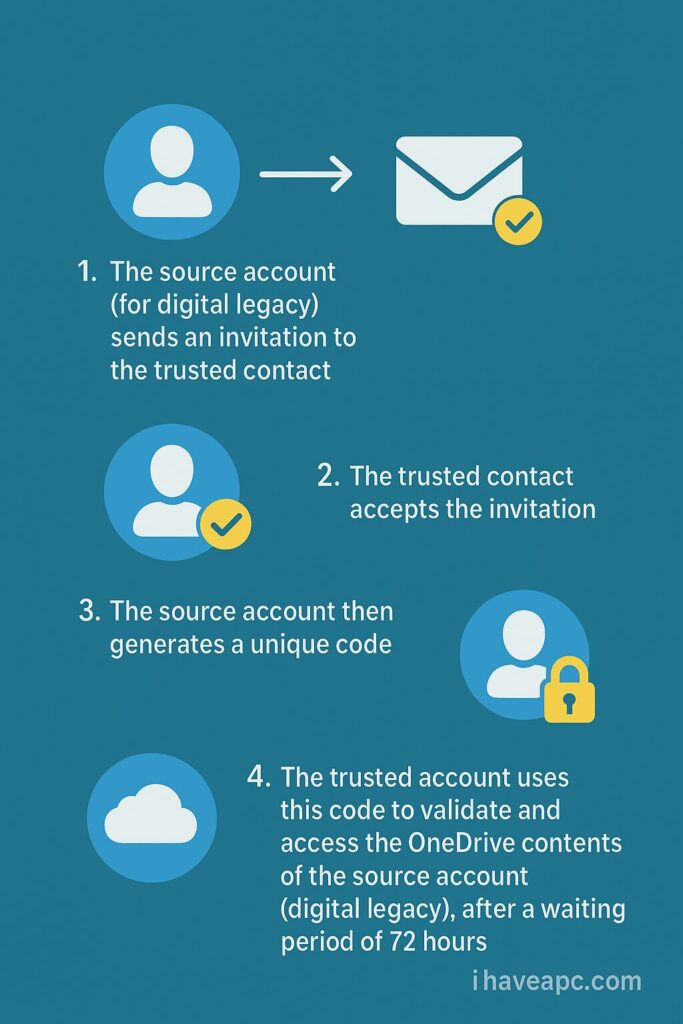
To setup digital legacy, you need to assign a trusted contact by sending an invitation. This contact too must be having a Microsoft account. So, enter the Microsoft account email address and click the Invite button.
The trusted contact will receive an email asking them to respond and need to click the Respond in OneDrive button that automatically opens this invitation in their OneDrive account.
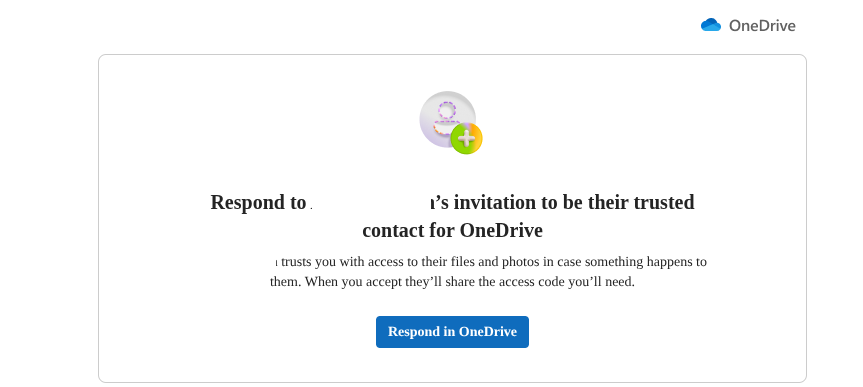
There, they need to click the Accept button to accept the legacy invitation.

Generating and using the unique code
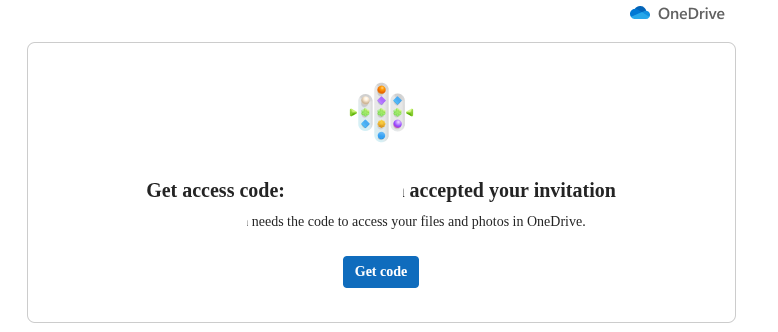
Once this invitation is accepted, the source account will need to generate a code. The source account will receive the email stating that their invitation is accepted and then need to click the Get Code button.
This once again takes them to their OneDrive account. Under the Digital legacy option, there will now be an option of the Get code button.
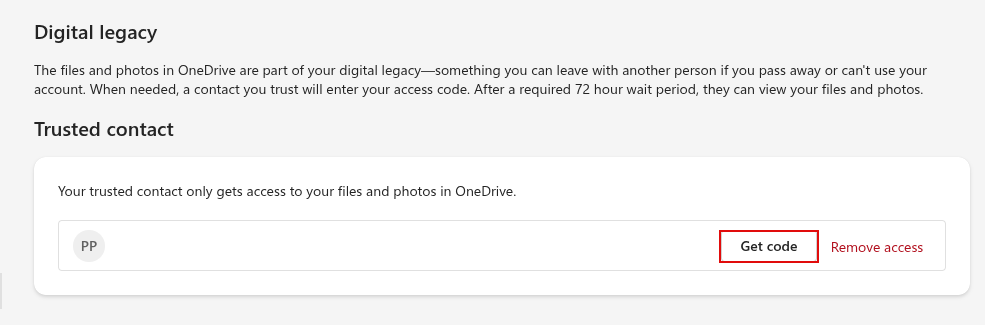
Clicking it generates a unique and long code. This code needs to be sent to the trusted contact who will manage your legacy account.
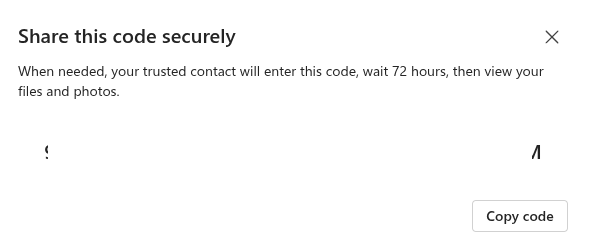
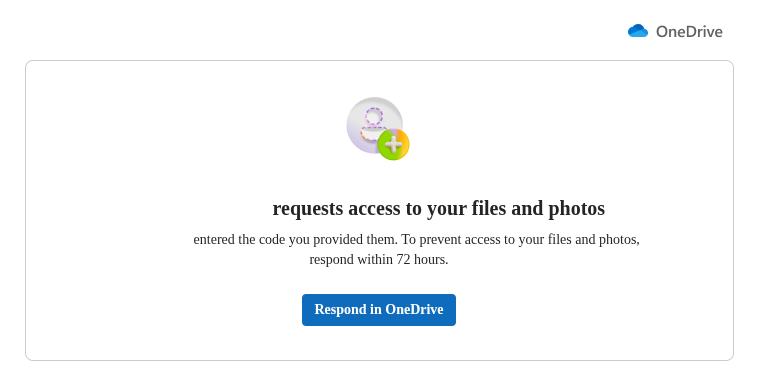
Once they enter this code, they need to wait for a period of 72 hours before they can access the source account’s files and photos in OneDrive.
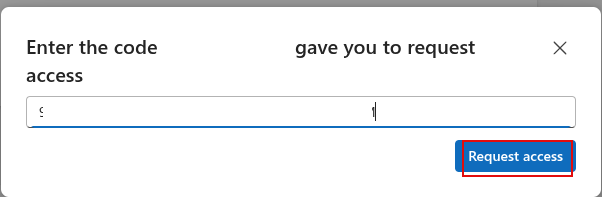
On entering the code, a wait time of 72 hours begins, after which the OneDrive contents of the source account can be accessed by the trusted contact.
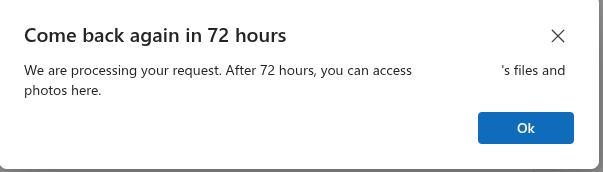
If the source account changes their mind, they can cancel the legacy request within 72 hours by clicking the Respond in OneDrive button and removing the trusted contact from the Digital legacy section.
All done.

Manage And Monitor Remote Backups For Servers Using Backup Bird
How To Change The Menu And Interface Language In Firefox
